


Tuesday, December 25, 2012
Sunday, December 23, 2012
Milk Meets Santa Video
A few weeks ago, my boys and I got a fun opportunity to be part of a Christmas video all about cookies, milk, and Santa for the Milk Mustache campaign. You can check the video out HERE or you can watch by clicking on the Youtube video below.
**So what REALLY goes down with Santa on Christmas Eve? Only these kids know the truth. Watch to find out!**
Disclosure: I was compensated by the National Milk Mustache "Got Milk?" Campaign for participating in this video.

Thursday, December 20, 2012
Easy Teacher Gifts in Jars
*mason jars*
*fabric*
*string*
*gift tags*
*& some kind of sweet treat*
{like Chex Mix Muddy Buddies}

*quick, easy, inexpensive, and SUPER cute*

Tuesday, December 18, 2012
Snowman Waffles
I pulled out my waffle maker this weekend and whipped up some fun and easy waffles to help get us in the Christmas spirit! I've made waffles for almost every other holiday there is, so I figured it was time to make some for Christmas too! These waffles would be so fun for Christmas morning or even for dinner on Christmas Eve if you don't have big family plans! And the wonderful thing about these cute Snowman Waffles is that you can even use a little help from the store and use frozen waffles instead of making them homemade!

I started with a stack of three warm and yummy waffles.

I got out my sifter and my {huge seven pound} bag of confectioners sugar.

I simply laid the waffles out to look like a snowman and then dusting them liberally with the confectioners sugar.

After your snowman is all covered with snow, all that's left is to decorate him!
a couple of chocolate pieces for buttons
Twizzlers for his mouth and scarf
an orange Tootsie Roll for his nose
Banana slices with Sixlets for his eyes
I just used the candy that we had on hand...mostly stuff from the Christmas parade that we went to a few weeks ago! The fun thing about this snowman is that you can pull out all your leftover gingerbread house decorations {or parade candy} and let your kiddos use their imagination to make Mr. {or Mrs.} Snowman anyway they want!


Linking up here..
Monday, December 17, 2012
Thoughts about Friday
I worked on a couple different projects this weekend...and I had intended to share one of them with you this morning. But when I opened up my blogger dashboard, I saw that quite a few bloggers are taking the day to remember the victims of the horrible event that took place in Connecticut on Friday...so I decided to share my thoughts and feelings instead of a crafty post today.
When I first heard the news, I was mostly in shock that another shooting had taken place. It seems like this kind of stuff is happening more and more often lately! I {probably like most of you} started trying to find out a little bit of information and completely forgot what had and was going on during the day for me. I read, and tried to hold back tears thinking of all the innocent lives that were lost in just a few minutes. So unthinkable!
It also made me think of my own kids...made me wonder if it was possible that something like this could happen to them. Because you know that not a single parent in Newtown ever in a million years thought that something like this would happen to their kids, their school, their community! I went on about my day with a heavy heart.
The strange things is, I was at Grant's school at almost the exact same time that these horrible things were happening, and it took me almost two days to realize it. I don't know why...maybe I was blocking out the what ifs. Because really what if...what if this had happened at my kids' school. What if I had been at their school working on a fun activity with Grant's WINGS class just like I was on Friday. What if some crazed man came into the school with a gun. It's hard to think about the what ifs.
I just happened to be at the school that day, but my mind keeps going back to all the teachers that are at school everyday. I know that their minds must be full of what ifs. Because you really don't know how you would react in a situation so terrible. I am heartbroken to hear about the teachers who lost their lives trying to save their students, but I am also so proud of them! To know that they were willing to lose their lives for their students makes me smile, even though I'm crying that they had to make that terrible choice.
I will be thinking and praying for the families that lost their precious children this week as they have to do what no parent ever wants to do.
**I'll leave you with a few pictures of what I was doing on Friday: making marshmallow snowmen with Grant's WINGS class. Oblivious to the evil things that were going on...just enjoying spending time with some really smart and sweet kids!**


Friday, December 14, 2012
Pallet and Hay Christmas Display
I never thought that back in August when I asked Jason to bring an old pallet home from work, that I would still be using it in December! That one pallet has gone from Barynyard Party to Fall Display to Christmas picture backdrop, and now I'm using it in my Pallet and Hay Christmas Display! It has been one of the most versatile outdoor decorations I've every had...and it was basically free except for the embellishments that I added to it!

Linking up here..
Thursday, December 13, 2012
Reading Fair Project 2012
The Reading Fair always seems to fall during the most busy part of the year...right between Thanksgiving and Christmas...but somehow we manage to find enough time to make a fun project each year. This year Henry's school is waiting until January to do their Reading Fair, which meant we only had to worry about Grant's project. Grant picked out a really cute book that we got at the Scholastic Book Fair back in October to use for his project: Pete and Penny's Pizza Puzzles The Case of the Secret Sauce. Grant read the book, then I read the book, then we got busy brainstorming project ideas.

We decided that making his board look like the outside of a pizzeria would be really cute! Grant started by painting the background of the board. I cut a kitchen sponge into the shape of a brick and mixed up a little bit of red and brown paint. I showed Grant how a brick pattern worked and he got busy stamping the board. He actually did a really great job and only got paint on one of my chairs in the process:) Jason found an old cardboard box and helped Grant cut the awning out with his exacto knife.To decorate the awning, Grant used my paper cutter and cut strips of red and white paper then attached them with spray adhesive.

I used my Silhouette to cut out the name of the book onto vinyl and Grant helped me add it to a piece of brown paper that he had cut to look like the sign for the pizzeria. Grant also added a big door, two windows, and two cute little bushes to write all of the required information on. After we got the windows finished, they needed a little something extra so I got out my circle punches and some pipe cleaners and Grant made some flowers to add to a window box.


To add a little bit more to the project, we made a jar of molasses {the secret ingredient that the kids in the book are looking for} out of an old Starbucks jar and some brown paint. Grant also decorated a pizza box that I picked up from our local pizza shop. He copied a couple of the puzzles from the book and we placed them inside the box. 

I was so proud of Grant for working hard and only complaining a couple of time! And I was even more proud when he won first place in his division at school! He was so cute when we were waiting for the winners to be announced...he had his fingers crossed on both hands! I think he wanted to win:) Since he won in his division, we get to move on to the district level in January.
Wednesday, December 12, 2012


Tuesday, December 11, 2012
Popcorn Snowballs
A couple of days ago, I was honored to share a fun and easy recipe as part of the awesome blog series "A Season of Serenity at Home" over at my friend Amanda's blog Serenity Now. And just in case you missed it over there, I'm re-sharing it here so you can all make these fun popcorn snowballs with your kiddos!
Snow is a rare thing where I live. I've seen snow at my home three times in my 30 plus years living in South Mississippi. And it can sometimes be difficult to get into the holiday spirit when it's 70 degrees outside and everyone is wearing flip flops:) So I decided that since my boys rarely get to play with real snowballs, it might be fun to make some edible Popcorn Snowballs instead!

I started by gathering my ingredients: two bags of microwave popcorn, a 16 oz bag of mini marshmallows, half a stick of butter, some flake coconut, and some white sugar sprinkles.

First pop your two bags of popcorn and put them in the biggest bowl you have. I ended up using the top to my cake keeper because it was bigger than any of my bowls:) After the popcorn cools a little dig through and pick out any of the popcorn kernels that didn't pop. I learned the hard way that unpopped kernels in your popcorn snowballs is no fun!

Melt your butter over medium heat...

...add your bag of mini marshmallows and stir until they are completely melted.

Poor the melted butter/marshmallow mixture on top of the popcorn.

Then stir, stir, stir! Mix it until all the popcorn has been coated in the marshmallow. Then let it cool for about 5 minutes.

While the mixture is cooling give each of your kiddos a piece of parchment paper and spray their hands with a little bit of cooking spray.

Carefully scoop up some of the mixture and give it to your kiddo. Let them use their hands to form the popcorn mixture into a snowball. At this point you can have plain popcorn snowballs....

...or you can make them fancy by rolling them in flake coconut...

...or white sugar sprinkles!

These were really fun to make, and {other than the messy bowl and a few messy fingers} they were really easy to make too! Now my boys can enjoy snowballs in the winter anytime they want....even if it's 70 degrees outside and we're wearing flip flops!
Linking up here..
Sunday, December 9, 2012
2012 Christmas Cards
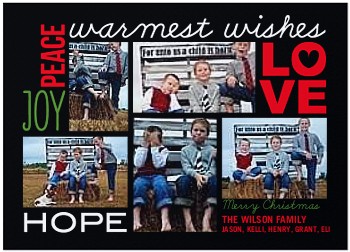
Surrounded With Love Holiday Card
Create custom new year's invitations at Shutterfly.com.
View the entire collection of cards.
Thursday, December 6, 2012
Washi Tape Christmas Trees: Easy Kid's Craft
If you are looking for a fun, quick, and easy Christmas craft to do with your kiddos, look no further! It doesn't get cuter or easier than these Washi Tape Christmas Trees!

Start with a print out of a Christmas tree outline, some colorful washi tape, and scissors.

Let your kiddo cut out the Christmas tree,

then give them a couple of rolls of washi tape and let them get busy covering the whole tree.

They can do a solid color tree,

make a pattern, or just decorate it randomly.

I let my boys cover their tree on our kitchen table making sure to go all the way {and past in some cases} to the edges...the beauty of washi tape is that is isn't so sticky that it leaves a mess if it sticks to furniture {or kids or clothes}.


Showing off their Christmas trees!

Laughing at the silly dogs who photo-bombed us:)

These would be really cute framed, strung up together to make a garland, or even sent to friends and family in the mail! So break out the washi tape and get busy making some cute and easy Christmas trees!

Linking up here..

Subscribe to:
Posts (Atom)


