Home AboutMe Crafts Food

Monday, July 4, 2011

Happy 4th of July!

We spent the weekend in the mountains of Alabama....
hiking to waterfalls
swimming for hours
eating bbq and fried fish
playing with cousins
decorating cupcakes
not using our cell phones
catching {really small} fish
celebrating a 1st birthday
&
watching fireworks!
***************
Today we are heading over to my parents' for more bbq and swimming.
I hope you all have a wonderful day celebrating our nation's independence!
Pin It!

Friday, July 1, 2011

Inside Out S'mores

Nothing says summer is here better to me than a warm, melty, gooey, chocolaty s'more! One of the best things about a s'more is that there are a ton of different ways to make them!

See, I told you! A ton of different ways to make them!
But an inside out s'mores is one thing I haven't seen...at least not the way I made them anyway:)
*******
To make Inside Out S'mores, you start with a JUMBO sized marshmallow {I picked these up at our local grocery store, but I have seen them at both Target and Walmart this summer so they should be pretty easy to find.}, mini teddy grahams, and some milk chocolate chips.
Using a very sharp knife, cut a slit into the top of the marshmallow being careful not to cut all the way through to the bottom. I was surprised at how easy it was to cut through the marshmallow even though it did get the knife pretty sticky. You can clean your knife in warm water after each marshmallow to make cutting them easier.
Stuff your marshmallow full of chocolate chips and broken up pieces of mini teddy grahams. Any kind of graham cracker will work and you could even try graham cracker crumbs, the mini teddy graham were just the perfect size for stuffing my jumbo sized marshmallows.
Another variation I tried was Nutella and broken pretzel pieces....YUM! It would also be really yummy to stuff small pieces of Snickers or Reece's cups inside your marshmallows too, but those aren't technically s'mores so we'll save them for another post:)
After you stuff your marshmallow, seal it up by squishing the cut edges together. Then put your marshmallow onto a roasting stick in the opposite direction that you cut your marshmallow.
Roast your marshmallow over a campfire or your gas kitchen burner until it is warm, melty, and gooey!
You can eat your Inside Out S'more right off of the roasting stick or eat it with your hands {and get your fingers good and sticky}! Either way the yummy melted filling makes these s'more a ton of fun and impossible to resist eating at least three:)

What is your favorite way to eat a s'more?
Pin It!

Thursday, June 30, 2011

Red, White, and Krispy Treats

Rice Krispy Treats are a favorite quick snack at our house, and nothing makes Rice Krispy Treats better than dressing them up for the holidays with a little bit of food coloring:)
To make Red, White, and Krispy Treats you will need to make three separate HALF batches of Rice Krispy Treats.
{1 1/2 tbsp of butter, 2 cups of marshmallows, & 3 cups of Rice Krispies}
You also need a 9x13 pan, a 9x9 pan, a star shaped cookie cutter , and red & blue food coloring.
Start each batch by melting down your butter and marshmallows. Leave one batch plain...
...add a little bit of blue food coloring to one batch....
...and a little bit of red food coloring to the other.
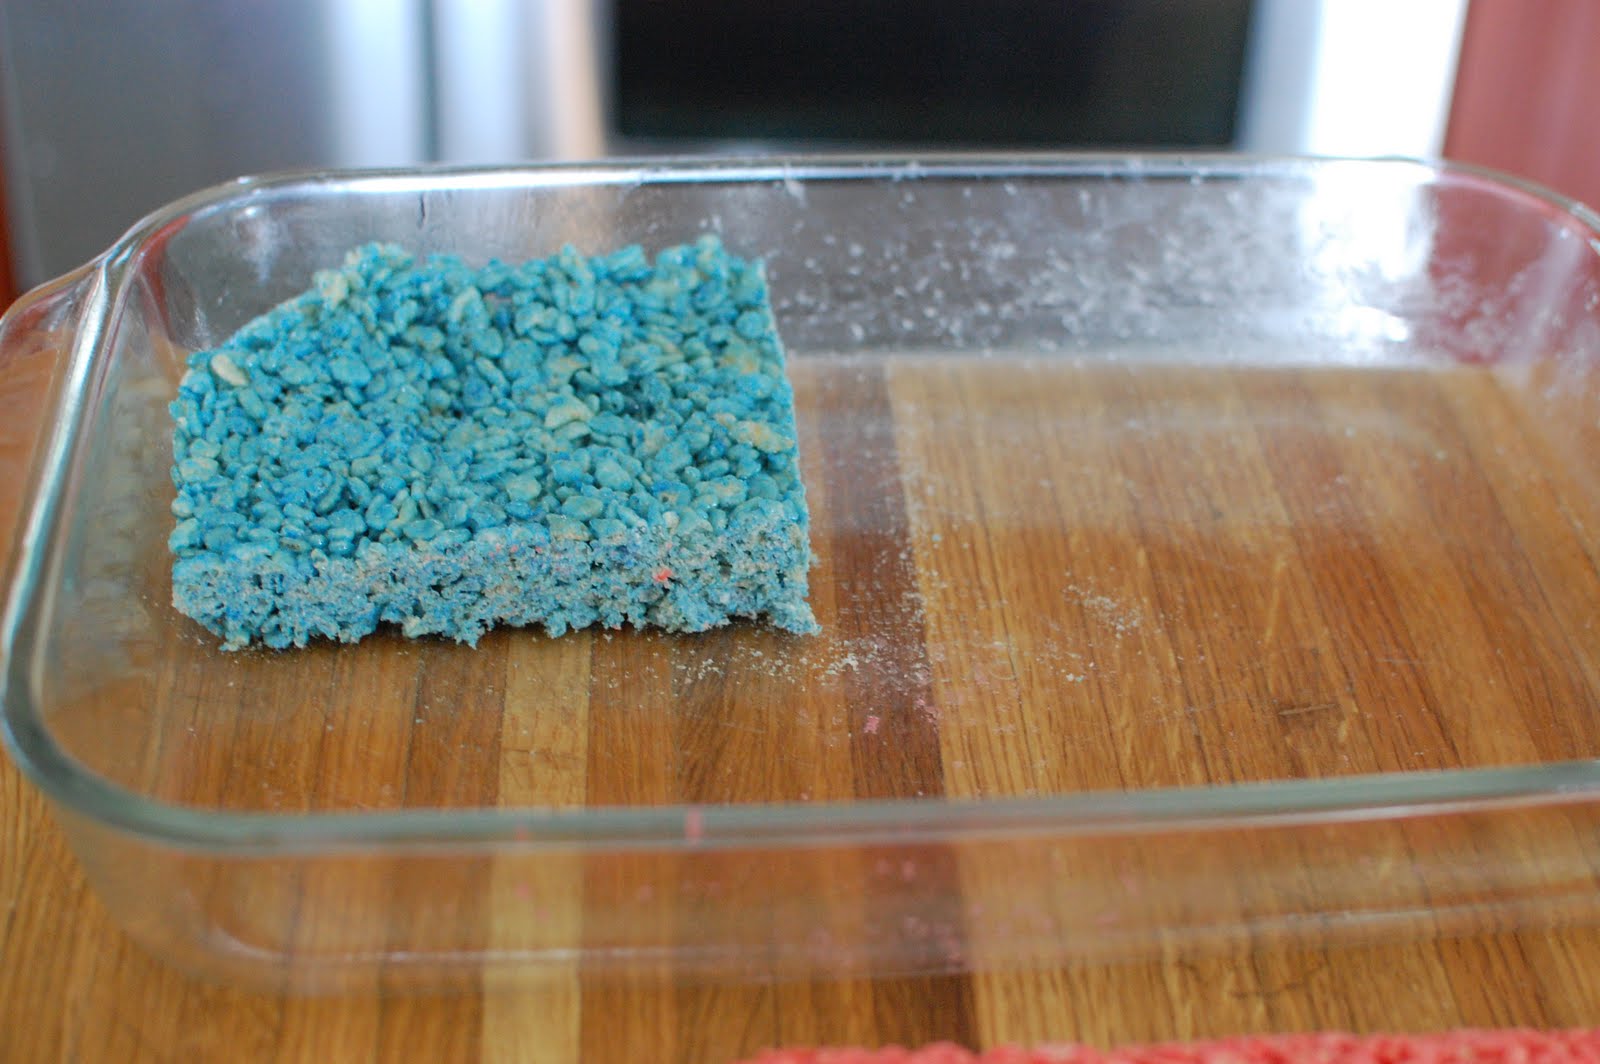
Make the blue batch of Rice Krispy Treats first and put them into the 9x9 pan that has been sprayed well with cooking spray.
Next make the red batch and add it into your 9X13 pan filling up only half of the pan.
Last make your batch of plain Rice Krispy Treats and add them into the 9X13 pan with the red treats.
Once the Rice Krispy Treats have cooled, turn them out of the pans onto a cutting surface.
Using a bread knife, cut the white and red into long strips about an inch wide. I ended up with 4 strips of each color.
Place your blue treats into the top left corner of the larger pan and estimate the size that you want it to be. Trim off the excess blue treats with your knife and then place your blue square of treats into the pan.
Starting at the bottom with a red strip of treats, add in the strips alternating red and white, ending with red. I used 4 strips of red and 3 strips of white. You will have to cut the top three or four pieces to fit into the pan next to the blue treats.
Use the star shaped cookie cutter to cut a few stars out of the leftover strip of plain Rice Krispy Treats, and then add them on top of the blue section of treats.

Even though there are a lot of steps, this is actually really easy to assemble...the hardest part was washing my pot between each batch:) I'm sure adults and kids alike will be really excited to see this fun patriotic treat on the dessert table for the 4th of July!

Pin It!
Related Posts Plugin for WordPress, Blogger...