Home AboutMe Crafts Food

Tuesday, July 19, 2011

Cupcake Waffles

I've had a cake mix in my pantry calling my name for weeks now! I had planned to make this fun creation weeks ago...you know when I was on my waffle kick...but I got distracted by kids, crafts, trips, and the 4th of July. The last few times I've opened my pantry all I could think about was that darn box of cake mix! So I finally got around to making my fun treat yesterday, and let me tell you it was totally worth the wait! So instead of keeping you in suspense any longer, I will tell you how you can make this yummy treat I call Cupcake Waffles:)
 Drool worthy right?!? The beauty is that they are really {no I mean REALLY} easy to make!
**************
Start with your favorite box of cake mix. I chose Funfetti cake mix simply because I thought the kiddos would like that best...what kid doesn't love sprinkles in their cake:) Make your cake mix according to the directions on the package.
 Warm up your waffle iron, spray it with non stick cooking spray, and them put your cake batter on the waffle iron. I used my trusty Pampered Chef scoop {the large size} that I normally use for cupcakes and I put three {plus just a little more} scoops.
 Cook your cupcake waffles on medium heat. You want them to cook through without getting too crispy on the outside. We are going for the texture of a cupcake but in the shape of a waffle:)
 Remove the waffle from your waffle iron and separate it into sections. Let it cool slightly.
 Put two sections of waffle on a plate and put a {smallish} scoop of ice cream on one of the sections...
 ...sandwich the two waffle pieces together...
 ...then top your cupcake waffle creation off with the icing of your choice. Again I chose Funfetti icing just because sprinkles makes everything more fun:)
And that is how you can have yummy {ice cream filled} cupcake waffles without ever turning on your oven!
Pin It!

Monday, July 18, 2011

Project Airstream: Demo and Paint

A few weeks ago I shared that we were the proud new owners of an Airstream travel trailer. I shared a few pictures of the {in pretty good shape} exterior, but what I didn't show you was the interior. This is partly because it is outrageously hard to take a decent picture inside a tiny travel trailer, and partly because the before is pretty bad! But since we have made a little progress and now you can {hopefully} see a little bit of my vision, I have some interior pictures to share with you:) 

This is the front of the Airstream when you come in the door. This is a fold out couch, and the place that Jason and I will call our bedroom at night. There is an overhead compartment and some storage underneath as well. This entire room was covered with those beautiful cream colored curtains. In the bottom right side of the picture you can see just a little of the kitchen counter top. The kitchen area consisted of a small sink, an ancient oven, a non-working refrigerator, and a small pantry.

This is the view looking from the front toward the back of the Airstream. On the right is the fridge, pantry and closet. You can see all the lovely 70's gold colored trim, and the weird vinyl wallpaper that was on some of the walls. The thing on the ceiling is the {dirty by still working} air conditioner. You can also see the really cool overhead storage compartments which we are currently trying to salvage just to keep a little bit of that vintage 70's Airstream feel.
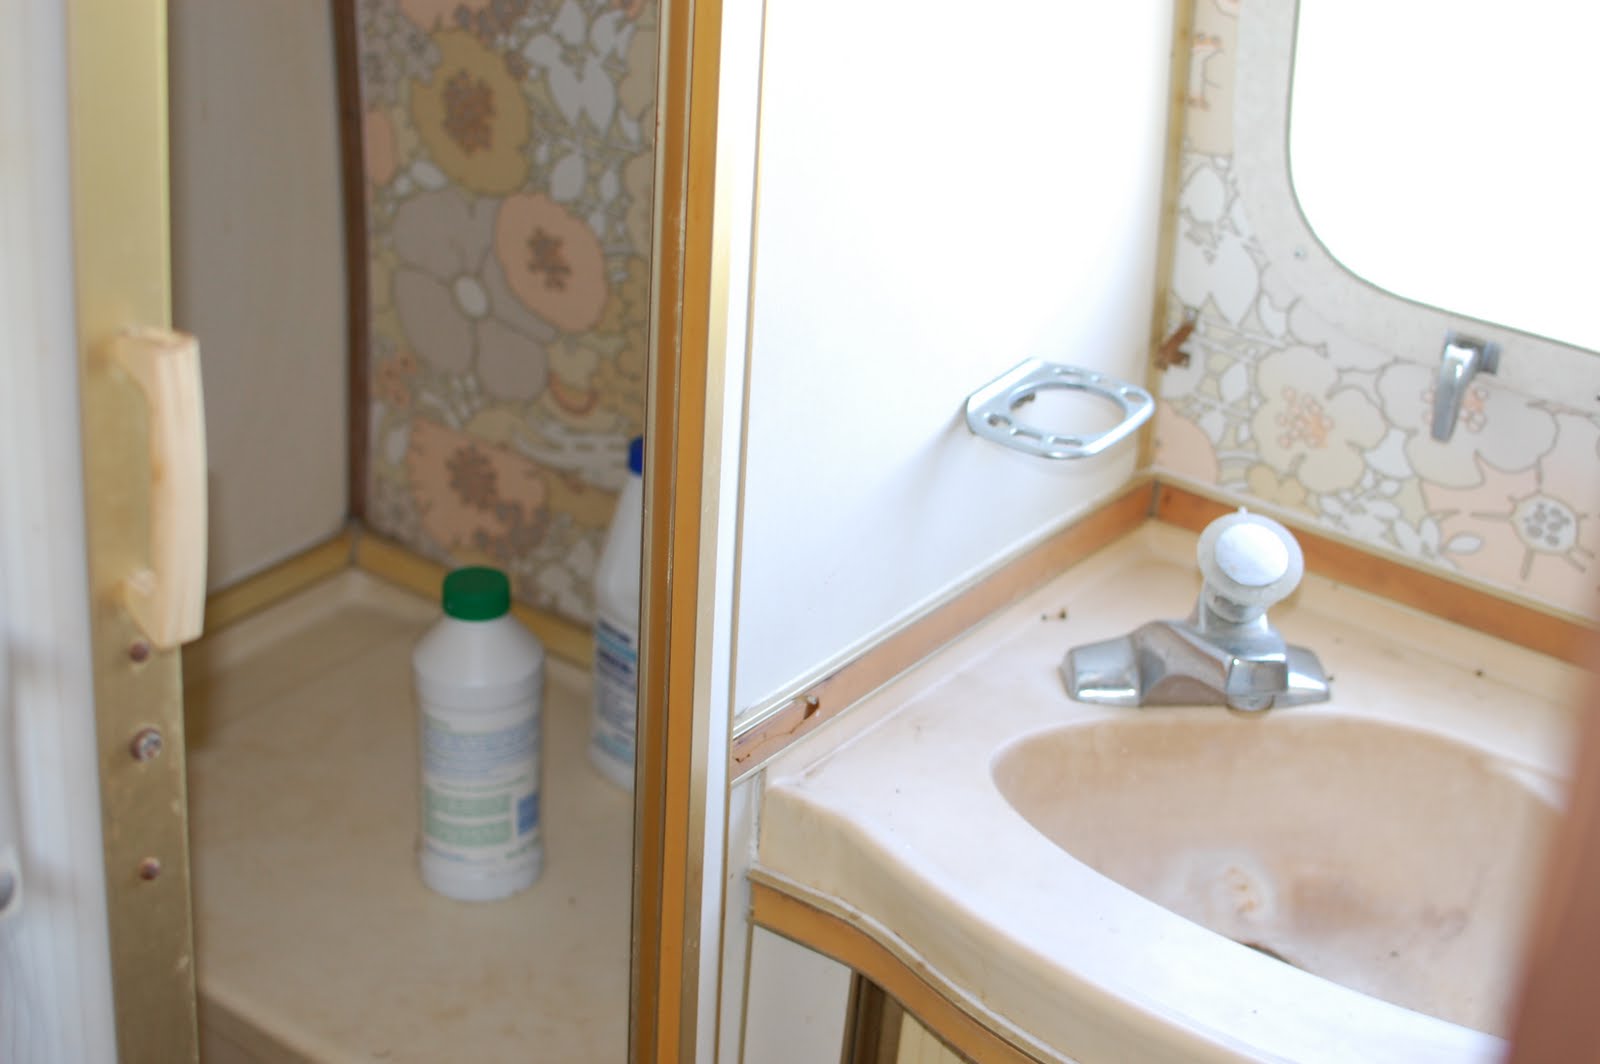
Down the hall to the left is the bathroom that was covered with 70's floral wallpaper. The bathroom also had a ton of gold colored trim and a yellow & wood grain toilet.
In the back of the Airstream there were two twin beds with a night stand between them. You can see more of the same curtains, and you can also see just a little bit of the {pink} carpet on the front of the nightstand. We are planning on putting bunkbeds in the area so that the back will sleep four instead of two.
When we got ready to demo, Jason started out just removing some of the furniture and some of the things we knew we weren't going to use. He quickly figured out that it would be easier for us to clean and paint if EVERYTHING was removed. So that is exactly what he did. This is a view looking toward the front of the Airstream where the couch used to be.
="">

This is the kitchen/bathroom side of the travel trailer. You can see that the only things left are a few pipes and some hanging wires.
This is the side of where the fridge, pantry, and closet were. Right after I took these pictures, Jason and I got busy scrubbing every surface with bleach and scrub brushes.
After all the walls were clean, we painted. The front area of the Airstream as well as the bathroom got a coat of Sherwin Williams Gris. A lovely gray color that isn't too dark, but also isn't beige either. The back of the Airstream {aka the boys room and the closet} got a coat of Sherwin Williams Drizzle. We actually matched this color to some bedding that I bought for the boys from Ikea a few weeks ago. I thought this color was light and airy without being too girly and it also goes really well with the gray we picked. 
You can also see that we painted the floor with primer just to make sure that any leftover 70's germs were sealed up:) We are planning on putting in laminate wood floors later, but for now the painted floors are much better than the dirty, stained floors that we had.
This weekend we worked on painting some of the partition walls and getting them back into place. I will share more pictures as we  make more progress!
Pin It!

Friday, July 15, 2011

Banana Pops

During a quick run to our local grocery store, my boys saw a box in the produce department that contained supplies to make banana pops. They asked if we could buy it, but I quickly said no. Little did they know, right then I made plans to make our own version at home without that little box:) We picked up a bunch of bananas and the other things that were on our list and headed home. While they were busy playing I whipped up a fun banana pop treat for them and I even added sprinkles to make them a little more fun:)
I started with a few bananas, chocolate melts, and lollipops stick. You will also need sprinkles, but somehow they didn't make it into my picture.
The first step was to cut my bananas in half and insert the lollipop sticks into the cut end of the bananas. I left the peel on the bananas and stuck them in the freezer for about an hour. I have seen these before and the directions say to peel the banana first, but I didn't want to worry about having a plate to sit them on in the freezer. Leaving the peel on allowed me just to stick the bananas in the freezer among the fish sticks, broccoli, and frozen waffles:)
After an hour in the freezer, I pulled out the bananas and removed the peel. Be sure to get all the peel and stringy things off...they can be stubborn in places and break because they are frozen.
Dip your frozen banana in melted chocolate. I used chocolate melts, but chocolate chips or almond bark would work too. Let some of the excess chocolate drip off the banana and then roll it around in your sprinkles. This is a messy step {notice I didn't get a picture of the sprinkle dipping}, so have a wet rag handy to wipe up your hands and any messes.
I left my bananas on the countertop to harden for about 15 minutes, but you can also stick them back in the freezer for a few minutes. Leaving them on the counter for a few minutes lets the banana soften up a little which makes it easier for little kiddos to eat them! Hand them over to your kiddos and watch their faces light up at the sight of all those fun sprinkles and yummy chocolate!
What kind of fun snacks have you been making for your kiddos this summer?
Weekend Bloggy Reading
Pin It!
Related Posts Plugin for WordPress, Blogger...