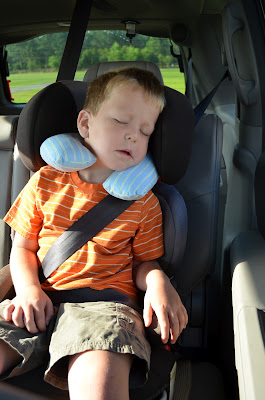
One thing that is great about kids and roadtrips is that for the most part kids can sleep anywhere! Seriously, I wish I was like that sometimes...it would make a long boring drive go by much faster. Even though my kiddos can sleep in almost any position possible when we are in the car, they never look very comfortable. They are always slumped over or their neck is bent so much it looks like it might break in half. So I decided that before we head out for our big trip, that all three of my boys {and I may get one too} needed travel neck pillows. But if you've ever shopped for one of those pillows, you know that they are usually pretty plain and kind of expensive. So I decided to try my hand at making some...and they ended up being really easy and really cheap!
I started by drawing out a pattern on a piece of paper. I searched online for a printable pattern, but I couldn't find one that I like...so I kind of just winged it.
{That ended up being a little bit of a problem because my first attempt was a major fail! But then I tweaked my pattern a little and the second one came out perfectly!}
Once you have your pattern, lay it on your material at the fold. This will ensure that both sides of the pillow are symmetrical. You can pin and cut like a normal pattern, but I was being lazy and just used a piece of chalk to trace the outline of my pattern.
Cut out two pieces {both on the fold} and then lay them on top of each other right sides together.
Sew around the edges of the pillow with a straight stitch.
Leave a hole in the pillow on one side. You will use this hole to turn and stuff the pillow.
Turn the pillow right side out and then add in a much stuffing as you would like. I filled mine pretty tight so it would be extra supportive for my boys' big noggins:) Then sew up the hole to finish the pillow.
Now when Eli decides to take a nap in the car he will be much more comfortable...and maybe he will sleep longer too!

Do your kids sleep in the car when you are on a roadtrip?
Linking up here..


