Home AboutMe Crafts Food

Tuesday, August 30, 2011

The Vacation Aftermath

We're back! Well, actually we've been back for a few days, but it has taken me that long to recover:) Please tell me I'm not the only one who feels like they need another vacation when they get home from their real vacation! We went non-stop {except for one afternoon nap} for 8 days at Walt Disney World, and let me just tell you it is exhausting! We saw almost everything {we skipped a few things at Animal Kingdom}, and we rode every ride at all 4 parks at least once...we rode some 5 times:)
Since we've been home...
*I've been trying to catch up on my sleep*
*I've unpacked 2/3 of our suitcases*
*I 've been busy washing, folding, and putting away loads and loads of laundry*
*I've watched way too many hours of reality tv on the dvr...thank you HGTV*
*I've gone shopping to buy groceries for our empty shelves and fridge*
*I've been stressing out about a birthday party that needs to be planned in less than 5 days*

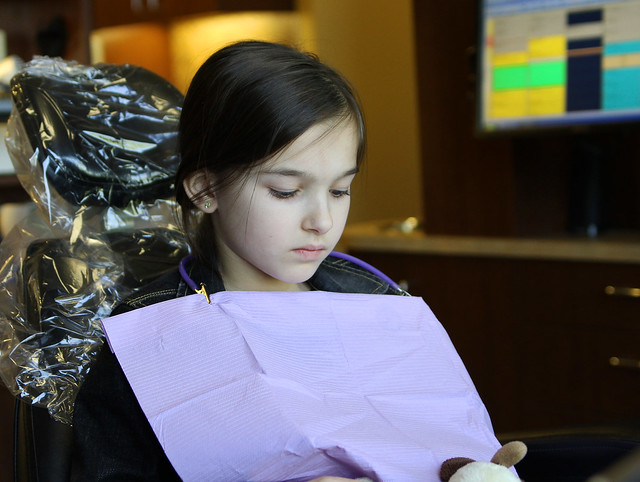
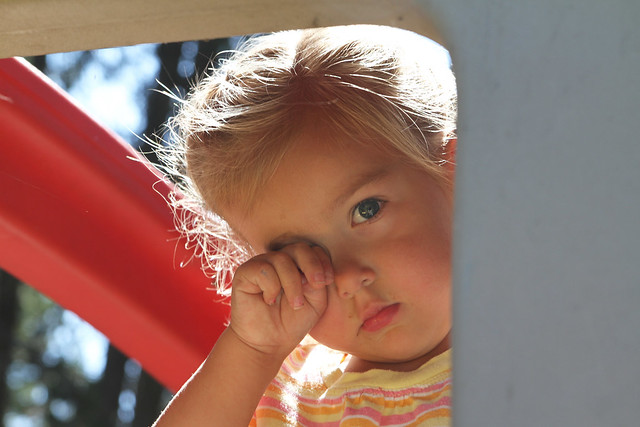
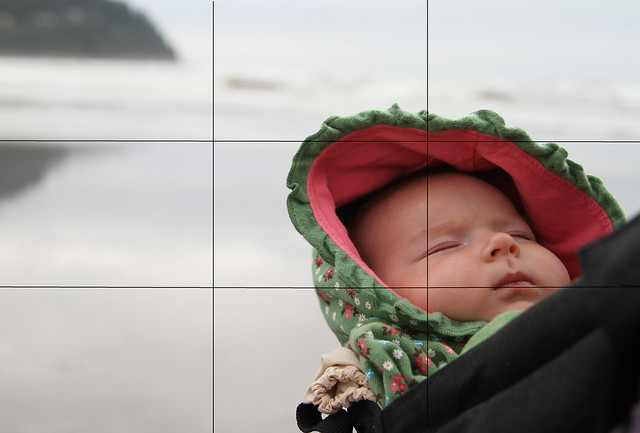
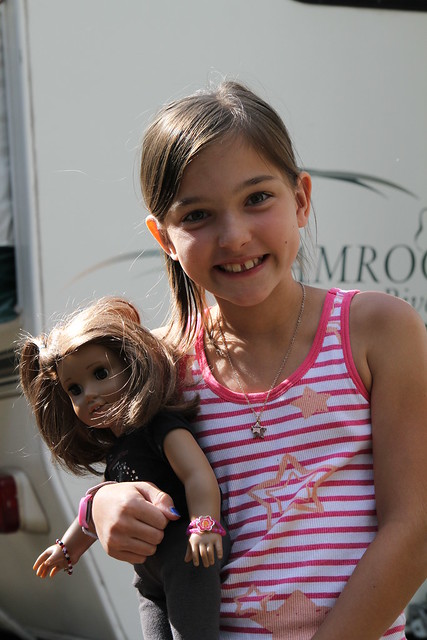
One thing I haven't done is edit the 347 pictures that I took while we were gone! So I'll just share two shots with you today and hopefully in the next few days I will find the time to edit them and share a few more:)


I want to say a great big THANK YOU to all my wonderful blog friends who did guest posts for me last week! If you missed any of their amazing guest posts, please go back and check them out and leave some comment love:)
Mon:  Felt Napkin Rings by Paula from Sweet Pea
Thurs: Baked Zucchini Bites by Amanda from Serenity Now
Pin It!

Sunday, August 28, 2011

Guest Post: Pumpkin Bread

Hey *Random Thoughts of a SUPERMOM* readers!!  I’m Joanna from This Southern Girls Nest

Kelli ask me to do a guest post while she’s away and I couldn’t wait to blog over here!  I love her blog!

You’ll normally find me blogging about my family {my hubby and 2 daughters} and what’s going on with us.  But I love to cook/bake so you’ll usually find at least one recipe a week.  I am also into crafting up a thing or two when I find the creativity.  Here lately that creativity has been hard to find!  Well..not too hard because of my newest addiction to Pinterest.  I’m constantly finding all sorts of things that I want to craft but for some reason I never make it to the store to buy any of the items needed. Hmph.  But I did manage to do one craft in the past couple of weeks…DIY Mercury Glass! 

However since my heart belongs in the kitchen I thought I’d share a recipe with y’all!  Since we had a taste of some Fall weather this week I thought I’d share a favorite recipe of mine…Pumpkin Bread/Muffins


What do you need?

  • 3 cups flour
  • 1 tsp cloves
  • 2 tsp cinnamon
  • 3 cups sugar
  • 1 cup butter
  • 3 eggs
  • 16oz can pumpkin puree {not the pumpkin pie blend}

What do you do?

  1. Combine the sugar…butter and eggs in a large bowl.  Cream them together.
  2. Add the pumpkin and mix until combined.
  3. Toss in your cinnamon and cloves.
  4. Add 1 cup of flour at a time letting the mixer combine one completely before adding the other.
  5. Add to your greased loaf pans {2} or to your muffin cups. Or both.  We always make one loaf and 12 muffins.
  6. Bake at 350 degrees.  Now if your doing the loaf you’ll bake it for an hour.  If your doing muffins..you’ll bake at 25 minutes or until a toothpick comes out clean.

We didn’t do the glaze on these this time because the hubby and I are on a mission to lose some weight.  Gotta cut sugar where ya can! ;-)  But if you want the glaze you’ll top it with your favorite confectioners sugar glaze.  Too make it fancy add 1/2 to 1 tsp sugar to your glaze before pouring over the top! 

I hope y’all enjoy! 

I’d love for you to come on over to my blog and visit if you’d like! 
Pin It!

Saturday, August 27, 2011

Guest Post: Sausage Egg Casserole


Hi there, SUPERMOM readers! My name is Yanet and most days you can find me in Florida playing and/or decorating (but not cooking) with my 3 Sun Kissed Boys. Sure I feed my little ones. But let's just say that cooking is not one of my passions. So, why am I showing a recipe today?! Because I do love making meals that involve togetherness. The type of meals where you can gather up the kids to help while you chat along. Plus, it's a pretty fool-proof recipe that happens to be delicious!

Here are the ingredients and directions. 
My little assistants and I made this casserole while we were on vacation this summer. My family and my BFF's family rented a beach house for a week this summer. Here are the steps in pictures.

Brown, drain, and set sausage aside. 

In a large mixing bowl, tear up bread into bite size pieces.

In a separate bowl, combine eggs, mustard, salt, and half & half.

Pour over the bread, add sausage, cheese and mix well.

Pour mixture in a greased 9x13 baking dish, cover, and refrigerate overnight. 

In the morning, bake at 350 for 45 to 60 minutes or until top is golden brown.

I had visions of taking at least one really nice picture of the served dish with a glass of juice, some fruit and a pretty little vase with a flower but.... The kids ate it like they hadn't been fed in a year!

I mean, really, when you find a heart-shaped strawberry, it begs to be photographed and showcased in a blog somewhere, right?

I hope y'all enjoy, not only the casserole, but also the fellowship that comes with working together with family and friends.

Kelli, thank you so much for having me over today. Now lets gather up the boys and eat!
Pin It!

Friday, August 26, 2011

Guest Post: Card Making


Hello Friends!  My name is Kelli and I blog over at Outside My Kitchen Window.  I am beyond honored to be joining you here today at *Random Thoughts of a SUPERMOM!*  I have been blog friends with Kelli for over three years now and I adore her name (hee, hee) and all of the great crafts ideas and fun (and yummy) recipes that she shares.

A little about me...I am a child of Jesus, wife, & mother of two.  I love pizza, colored pens, notebooks, Coca Cola, dolphins & sunflowers.  I am also passionate about organization and card making.
Today I would like to share with you the reason that I love making cards...thoughtfulness.  I love to take the time to appreciate a person and giving a card is one way to do that.  I like to take it a step further by making the cards myself.  I discovered this over two years ago when I attended my first Stampin Up! (the products that I use) workshop and haven't looked back.
Thank you cards are the cards that I make the most and I have some pictured below to share with you.  I have even talked about making simple thank you cards here.


I design the front of the card mostly.
But, it is also nice to add a little something to the inside:


I enjoy making cards for my kids' teachers...there are so many reasons to say thank you to them.

I tend to lean more towards brighter colors.  I love the simplicity of this card and how the white makes the colors pop!

Then there are times when I want to say hello to a friend and thank her for just being her.

I just recently opened up an etsy shop.  You can find it here if you are ever in need of a special way to say thank you (or thinking of you, happy birthday, I'm sorry, etc...I make a variety of cards).
Lastly, for fun I also like to make my Christmas cards each year.  It's almost about that time to start this year's card.


Thank you Kelli for having me and thank you Friends for joining me today.
Happy Stamping :)
Pin It!

Thursday, August 25, 2011

Guest Post: Baked Zucchini Bites

So excited to be able to share a post with Kelli's readers today! My name is Amanda, and I blog at Serenity Now, a lifestyle blog. Something I've been thinking a lot about lately is eating healthy, and what better way than to use those things in our garden called vegetables? I know it sounds crazy, but I thought "Wouldn't it be cool if I could find a good use for those greeny things I've been growing all summer?"

My sister is a great cook, and she shared a zucchini recipe with me that I just had to try. Before you click away, let me just say that I normally find zucchini to be fairly blech unless it is all shredded up in a sweet bread recipe. I found this recipe to be absolutely delicious....I make such an effort for my girls to eat balanced meals--it's time for me to do the same!


Baked Zucchini Bites

Ingredients:

1-2 Large Zucchinis (depending on how many "bites" you want)

Bread Crumbs

Egg Yolk

Herbs

Garlic Powder

Salt and Pepper, to taste


My grocery was out of bread crumbs when I rushed in with two cranky kids, so I had to settle for herb seasoned stuffing mix, which I crushed in a plastic baggie with a rolling pin and placed in a small plastic container:


I sliced my zucchini into thin pieces and set up a little "dipping station." (Please forgive the photos...a thunderstorm came through as I was cooking and ruined my lighting--a blogger's worst nightmare!)


The first station was to dip a slice into the egg, then coat with bread crumbs and set aside:


I placed the zucchini bites in a single layer on a baking sheet and baked them for 20 minutes at 450 degrees F. I was rewarded with a nice plate of tasty veggies!


Paired with a small salad and some chicken, it was a great dinner. I'll be posting the recipe for the Red Pepper Chipotle Lime Sauce soon if you're interested in a great veggie dip/spread:


What are some ways you "dress up" healthy food to make it tasty for your family?

Thank you so much, Kelli, for sharing your blog with me today!
I hope Random Thoughts of a SUPERMOM readers will stop by Serenity Now to say hi. You'll find crafts, thrifty decorating, recipes, and more at my blog. I also host a weekly Weekend Bloggy Reading party for bloggers to share their best post of the week. I'd love to "see" you there!
Pin It!

Wednesday, August 24, 2011

Guest Post: Photography Tips

Hi there! I'm so excited to be guest-posting for Kelli while she's away!  My name is Liz, and I blog over at Sugarplum Creations.  I'm a stay-at-home mama to four little girls.  Yep, FOUR.  Our newest little sugarplum was born in June, and she is keeping us quite busy.  We spend our days homeschooling, crafting, and playing dress up and beauty salon.  And I insist on documenting every single second.

Photography has always been fascinating to me.  I would spend hours poring over photo albums when I was little.  I love the way you can come across an old photo, and be completely transported back to that time.  I love to journal, don't get me wrong, but there is nothing like a photo to tell the whole story.  And if a picture is worth a thousand words, then a good picture . . . well, that's priceless.

So, let's talk about some simple ways to improve your everyday photos.

Have your camera ready.

Okay, this seems like a no-brainer, but if your camera is hiding away in its bag in a closet somewhere, guess what, it's not easily accessible.  And it's going to be more than a little difficult to capture those fleeting moments.  Get your camera out.  Use it daily.  I take my camera to the library, grocery store, and dentist.  Cameras are not just for birthdays, holidays, and vacations.  Capture the little moments.  You'll be so glad you did.
Dentist2

Now that you have your camera ready . . .

Say no to "the cheese"

While posed photos definitely have their place, if you really want to document every day life, you're going to have to be sneaky.  Catch your littles playing Barbies, brushing teeth, climbing trees, even pitching fits {hey, someday you'll miss the feisty moments too!}

CampingPart3B

Remember and implement the Rule of Thirds

Subjects don't always need to be centered in the frame.  In fact, eyes are not naturally drawn to the center of a photo.  Try to compose your shots by envisioning a grid of sorts on top of your photo, dividing it into nine equal parts.   Then place the most important subjects on or near the "lines", especially where those lines intersect.  A simple way to make your photos even more interesting!

Photography Tutorial, Rule of Thirds copy

Look how little Miss' eye and mouth fall right on the lines.

Find the Right Light

Lighting is probably the single most important factor in photography.  I won't go into a long explanation of how ISO, Shutter Speed, and Aperture work together to give you a properly exposed photo.  That would take way too long, and probably bore you to death.  What I will say is that, whenever possible, find natural light to work with.  I stay away from flash completely because it is difficult for me to use without creating harsh shadows and giving an overall unrealistic feel.  Sometimes you have to experiment with lighting to see what works best.  For example, on our camping trip, my daughter had crafted a bracelet for her American Girl doll.  She wanted me to get a picture of her with Meghan {her doll}.  It was sunny, but we were among many trees.  The lighting was very uneven.  I snapped a picture:

086

Hmmmm.  Dark shadows.  Not real flattering.

I simply moved my subject a couple of feet over . . .

CampingPart3E

And voila!
Okay, so the photo is not phenomenal, but I think you can see that moving a little made a big difference.

~~~~~~~~~~~~~~~

There you have it, a few simple tips to make your photos spectacular.  Now, go find your camera's manual, and read up.  And remember, practice makes perfect!
Pin It!

Tuesday, August 23, 2011

Guest Post: Chocolate Chunk Cookie Recipe

I am not a baker but do love to cook. However, I decided I needed to come up with a chocolate chunk cookie that suits my needs; lots of chocolate, and thick. Many people like cookies that flatten as they bake, but not me. I like them thick, the thicker the better:) My kids get all excited when I bake a treat during the week, because it is not something I do often. I am not cool so have to do everything by hand, no KitchenAid Mixer here, like my dear friend Kelli. This is really the ultimate chocolate chunk cookie recipe giving me everything, huge chocolate chunks and a nice sized cookie. I highly recommend doubling the recipe as the basic recipe only makes about 36 cookies, which will not last long. When making this cookie the dough may seem crumbly so get your hands in the mixture to make a large ball:) We like messy cooking in our home, so why not do it with baking as well! I hope you all enjoy this recipe. Fall is coming so baking season is coming up quickly!

Chocolate Chunk Cookie Recipe

Ingredients:

1/2 cup butter-unsalted, room temperature
1 cup firmly packed brown sugar
1 large egg
1/2 teaspoon vanilla
1 1/2 cups all-purpose flour
1/2 teaspoon baking soda
1/4 teaspoon salt
8 oz Semi-sweet baking squares-chopped

Directions:

Preheat oven to 375°F. Beat butter and brown sugar until creamy. Beat in the egg and vanilla. In a separate bowl, stir together flour, baking soda and salt. Add flour mixture to the creamed mixture, beat well. Chop the baking squares by hand(1/4 inch chunks or so). Stir the chocolate in by hand. Drop by rounded tablespoonfuls onto lightly greased baking sheets(I do 12 to a sheet). Bake in preheated oven for 8 minutes(set your timer) Immediately move from pan to wire racks to cool. Enjoy with a glass of ice cold milk!

Nichol is a mom of two, and blogs over at KiddiesCorner Deals, where she posts about online kids deals, recipes, reviews and giveaways. She knows kids are expensive, but shopping for them doesn't have to be! She is thrilled to be guest posting on Kelli's blog while her family is away on vacation.
Pin It!

Monday, August 22, 2011

Guest Post: Felt Napkin Rings

Hello, Random Thoughts of a Supermom readers.  I’m Paula from Sweet Pea and I’m delighted to be guest posting today for Kelli.

When I was a child, I remember my mom and grandmother making felt napkin rings as party favors.  I never forgot them and always wondered how they were made.  This spring in Southern Lady Magazine, there was a feature on these cute napkin rings that I so fondly remembered, but no instructions.  Following the picture in the magazine, I figured out how to make them.
SL


I played around with felt and came up with these three samples.
Example1

Example3
Example2


Aren’t they fun?  Would you like to make some?  I thought you would! 

Supplies Needed:
Felt in colors of your choice
Scissors and/or rotary cutter
Ruler
Sewing pins


Make the Napkin Ring:

Make the napkin ring which also becomes the center of the felt flower by cutting 7” x 2” strips.  (My pictures show three strips.  Cut as many strips as you need to make your desired number of completed napkin rings.)
Ring1


Fold each strip in half and secure with pins.  This will make cutting the felt much easier.
Ring2


Cut a heart shape on each end of the strip, stopping a little less than half-way through the width of the strip.  Then cut from heart to heart.  This is difficult to explain, so I roughly sketched in red how you should cut but be aware that the heart on the right doesn’t look so much like a heart.
Painted VERSION


They should look like this once cut.
Ring3


And should look like this when you open each strip.  (Kind of like a bone!)
Ring4


Make the Flower:

Cut a 4” square for each flower.
Flower1


Fold the square into fourths and pin.  (Sorry for the color switch.)
Pink1


Cut a half circle starting from the halfway point of one side and ending at the halfway point next to it.  (Cut from black dot to black dot.)
Pink2


Do not make a half circle on the side that contains all of the folds.
Pink3


Now make a small clip across the folded end.
Pink4


It should look like a flower when you open it up.
Pink5


Make the Sepals:

Cut a 4 1/2” square for each sepal.  In nature these are green but feel free to choose any color you wish.
Sepal 1


Fold the square into fourths and pin.  Cut a sailboat shape out as shown below. (Another felt color change..I made quite a few versions.)
Sepal 2


Cut off the folded tip to make a hole in the center and it should look like this.
Sepal 3


To assemble the flower, place a flower on top of the sepal, lining up the holes in the center.  Wrap the napkin ring part around a napkin and then bring the ends through the lined-up holes and you’re done.
FinishedFinished2


Felt is inexpensive and this idea could be used to coordinate with the season.   Here I’ve used two for a fall place setting and one for a summer one.
Stage1Stage2Stage3

This project makes a great table favor.  Pink or blue could work for a baby shower or all white could be used for a bridal shower.

I hope you enjoyed this project and that you might consider trying it.

Many thanks to Kelli for having me today.  I’d love it if you’d stop by Sweet Pea sometimes for a visit.
Pin It!
Related Posts Plugin for WordPress, Blogger...