Home AboutMe Crafts Food

Friday, April 22, 2011

Froot Loop Easter Egg Treats

Making fun treats with my kiddos is one of my favorite things about any holiday. We always make gingerbread men at Christmas and some kind of red, white, & blue dessert for the 4th of July. This year I wanted to make something new for Easter since we don't really have a traditional Easter treat that we always make.  I took an idea that I saw in my Family Fun magazine for Rice Krispy Eggs and changed it around a little to make things more colorful...and frooty!
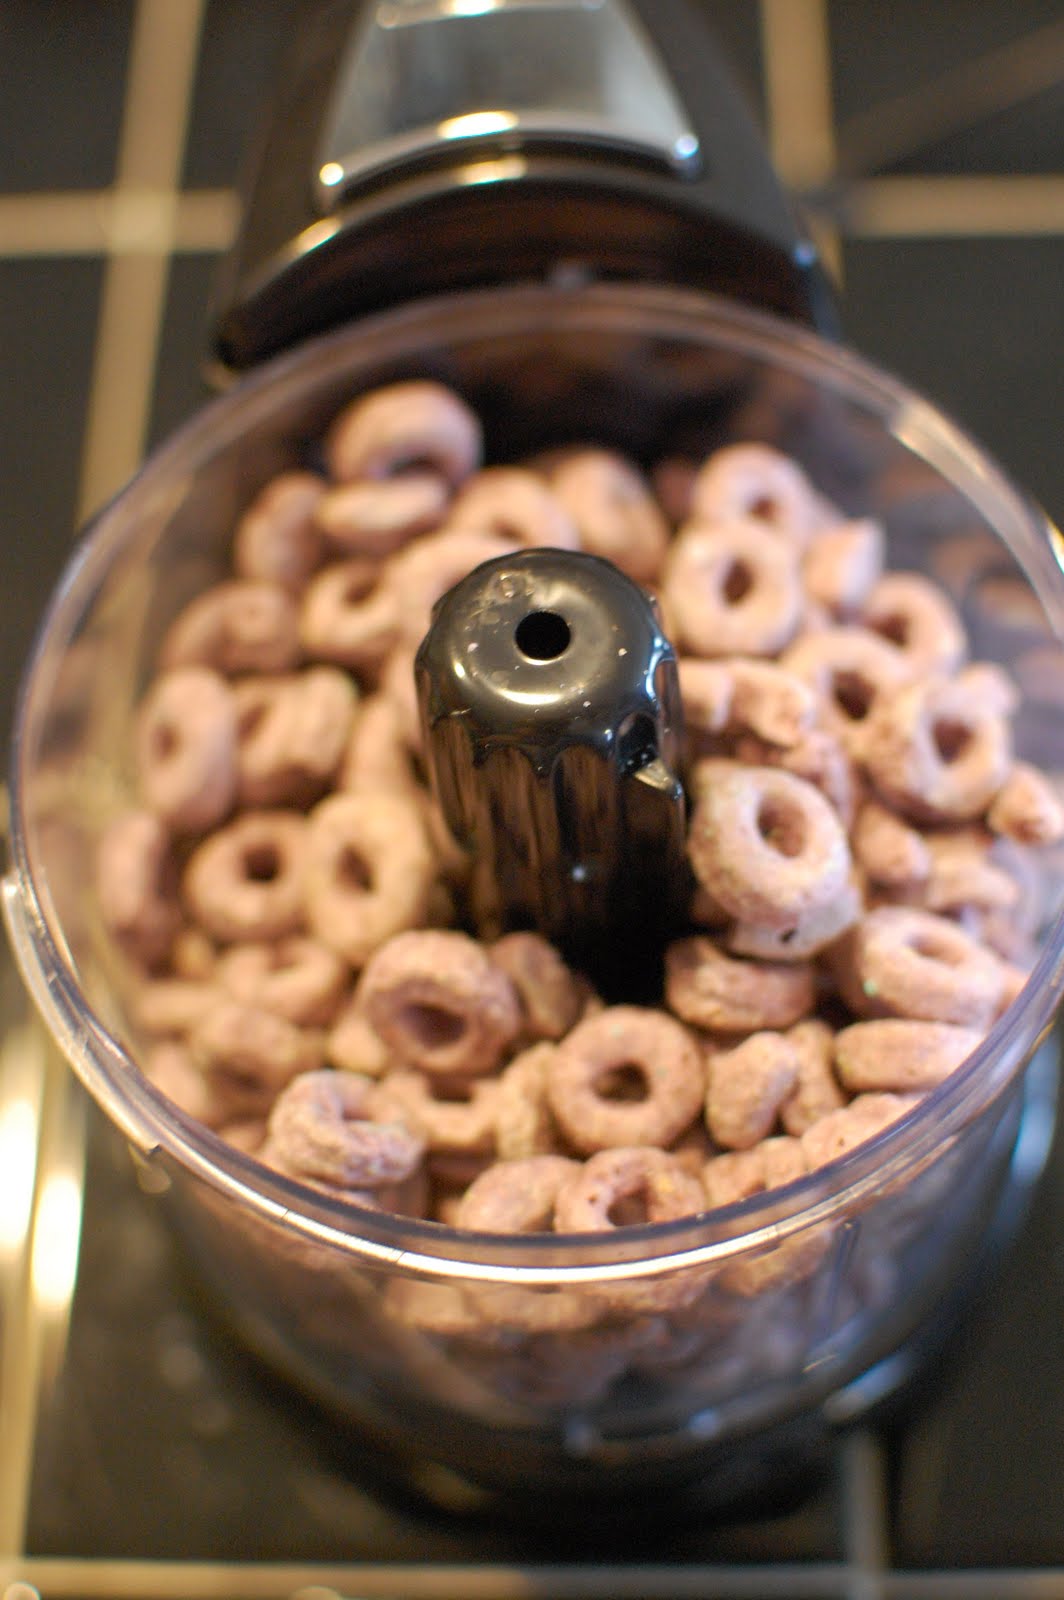
We started with a big box of Froot Loops and bunch of empty bowls. Henry and Grant got busy sorting the Froot Loops by color, and Eli got busy eating the few Froot Loops that I gave him to sort:) You could also make this without sorting and have fun rainbow Froot Loop Eggs....but the sorting was half the fun for my boys!
I placed the sorted Froot Loops in my small chopper and pulse it a few times just to break the cereal up a little. Don't chop it up too small or it will turn to powder! Repeat this step for each of the colors of cereal and place them into 6 separate medium sized bowls.
Melt down marshmallow and butter like you would for Rice Krispy Treats. After the mixture is completely melted, allow it cool slightly then evenly divide the marshmallow mixture into the 6 bowls of different colored cereals.
Stir the cereal into the marshmallow mixture using a spoon or your hands. Either way you chose to do it is fine, just make sure to keep the cooking spray handy so that the marshmallow doesn't stick to your spoon or your hands.
Once everything is mixed together, hand it over to your kiddos and let them have fun stuffing it into {washed, dried, and sprayed with cooking spray} plastic eggs.
Put the cereal mixture into the two pieces of the eggs and then squish them together to make a solid cereal egg. We let ours cool a little inside the plastic egg so that it would hold it's shape better.
You can serve them up on a cute Easter plate....
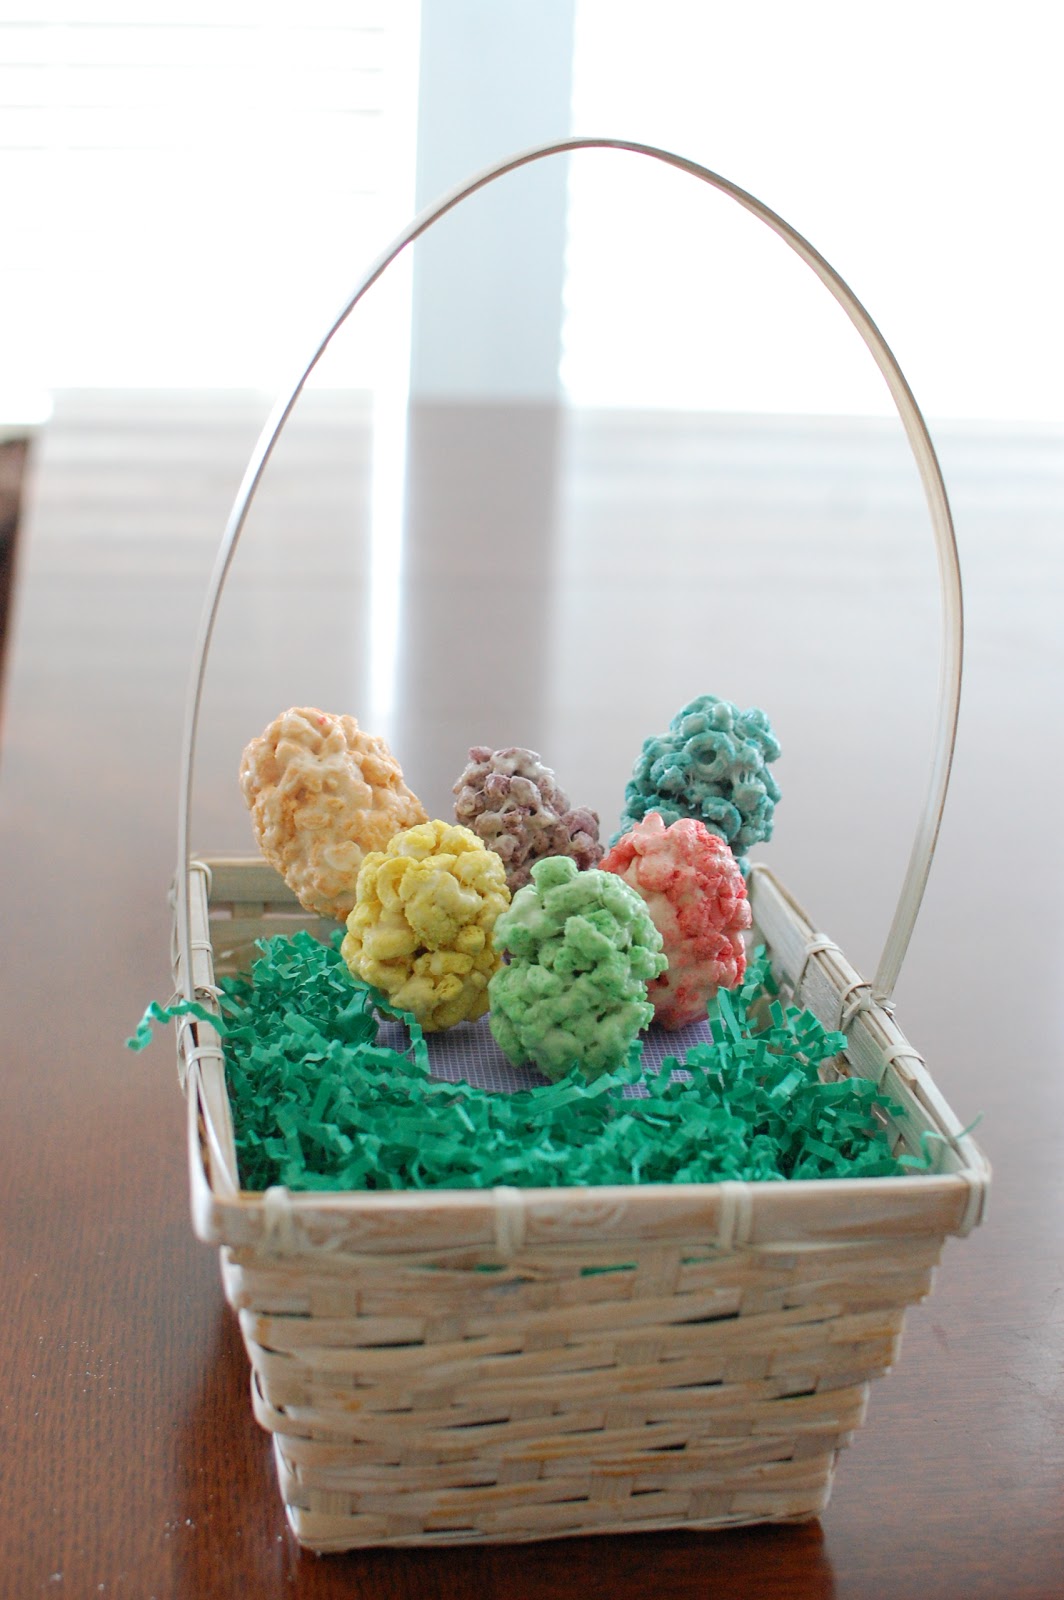
...or display them in a basket as the centerpiece of your Easter table!
I love that they are colorful just like the real eggs we dye every year, and my boys love that they got to help make such a fun and yummy treat!


This week I'm linking up with my sweet friend Amanda and her fun Weekend Bloggy Reading linky! If you have some down time this weekend go check out all the fun!
Weekend Bloggy Reading
Pin It!

Thursday, April 21, 2011

Pen and Pencil Caddy: Kids Recycling Project

In celebration of Earth Day tomorrow, Henry had to make a recycling project for school. We thought of a bunch of ideas from a soda bottle bird feeder to a fold up race track made from a big box, but in the end we made a cute Pen and Pencil caddy out of an old cereal box and some toilet paper tubes.
 We started by cutting the bottom of the cereal box off just a little bit shorter than the toilet paper tubes. Then Henry got busy measuring, cutting, and then gluing decorative paper to the box and 5 toilet paper tubes.
 I used an X-acto knife to straighten up the top edge of the box.
 When all of the toilet paper tubes were covered, we placed them inside the box.
 I printed out a Pens & Pencils label for the front just to make sure his teacher knew what he had made:)
 And that is how you make a really cute, easy, and RECYCLED Pen and Pencil Caddy!
Have you recycled anything today?
{For more fun Earth Day ideas, check out this fun post from last year when we made upcycled sand toys!}
What kind of fun treats are you making for your kiddos this summer?
Visit thecsiproject.com
Pin It!

Monday, April 18, 2011

Adding a Little Spring

I have a love of pretty placemats...but the funny thing is there actually aren't any placemats on the tables in my house. Instead we have placemats on our couch, and now we have placemats on our porch and in our yard!
I saw these really pretty placemats a Target a few weeks ago and knew that they were just the pop of spring color that I was missing in my front yard. I picked up three of them at $2.99 each, and for less than $10 I created a new garden flag and covered two outdoor pillows.  Let me start by saying that these were a little more heavy duty than the placemats I have bought previously, so I have a feeling they were made for outdoor use...and so far so good. 
 To make the garden flag, all I did was fold over one of the short ends of the placemat and sew in place making a loop to hang the flag. I didn't add any embellishment to the flag because I love the pattern of the placemat, but you could easily sew or glue on an initial or monogram.
 I also covered my outdoor pillows that sadly still had the black and orange covers on them from fall!
 To cover the pillows, I simply used my seam ripper to take out the seam from on of the short sides of the placemat. Then I slipped the placemat over the pillow and folded down the extra fabric.
I think these were just the thing my front yard needed to get ready for spring!
Pin It!

Friday, April 15, 2011

Dirt Cups

Last week, one of Grant's teacher asked if I would mind bringing Dirt Cups for the kids in his class. I said sure....no problem. The only problem was that I really hadn't ever made Dirt Cups before and I didn't have a recipe! Luckily my lovely blog/twitter friend Angie came to the rescue after I sent out a distress tweet asking for a recipe! She sweetly emailed me a copy of a recipe out of a church cookbook from her childhood! I used her recipe as a base, changed up a few things, and made it times 1 1/2 so that I would have plenty for the almost 30 kiddos in Grant's class!
:Dirt Cups:
2 packages of Oreos
3 8oz. packages of cream cheese
3 cups of powdered sugar
1 large box of instant chocolate pudding
3 cups of milk
12 oz of Cool Whip
gummie worms
::::::::::::::::::::::::::::::::::::::::::::::::::
I started by putting one package of Oreos at a time in my food processor and letting them whirl!
 You want the cookie crumbs to be the texture of real dirt, and that only takes a few seconds in a food processor!
 In my lovely {but oh so old} KitchenAid mixer I added the 3 blocks of cream cheese and the 3 cups of powdered sugar. I slowly incorporated the two so that powdered sugar didn't fly all over my kitchen, then I set it on medium speed and let it go until it was well blended and a little fluffy.
 While that mixture was working, I added my pudding mix and 3 cups of milk into a bowl and whisked them together well to get out any lumps.
 Then I added in my Cool Whip and slowly whisked it in until the mixture was smooth.
 Next I added my pudding/Cool Whip mixture slowly into the cream cheese/powdered sugar mixture. Beat on low until all ingredients are well mixed making sure to scrap the sides of the bowl....the cream cheese mixture likes to hang out on the side of the bowl and not mix in so work it a little!
 The last thing I added to the mixture was about a third of the cookie crumbs from earlier. I didn't really measure, just dumped in enough to give the mixture a little fun texture!
The next part is one of the most important: quality control. Before you serve up this yummy mixture, you really should lick the beater to make sure that it taste just right....or at least that they way we roll at our house:)
 Scoop up the mixture into small clear cups and top the cups with the remaining cookie crumbs and a gummie worm!
 I think the kiddos in Grant's class are learning about insects this week, but this would also be a great snack for Earth Day next week too! It was seriously so yummy that we may be making it again next Friday:)

Visit thecsiproject.com
Pin It!
Related Posts Plugin for WordPress, Blogger...