Home AboutMe Crafts Food

Thursday, June 3, 2010

6 Days of Summer Fun! Day Three: Make Your Summer Plans with a Welcome Summer Banner

Welcome to Day 3 of our 6 Days of Summer Fun with the Super Moms
6DaysofSummerFunwiththeSUPERMOMS
This post is from Angela at Secretsofasupermommy.blogspot.com

I like for Summer at our house to be SUPER FUN, of course!
But I wanted to be sure that we were doing the important things as well (reading, making bank deposits in their savings accounts{and that means earning money by doing chores}, and working on goals (CubScouts, Piano, etc)! I made this banner last year to help be sure we were getting the things done that we needed to get done and mixing the right amount of FUN in with it!

First, I printed out little tags with all of the things we were planning to do this summer.

Here is my list:
Surprise!
Something Special! (this is great for those one time things)
Extra Fun (this was for when I added something on to one of our weekly activites)
School (they went to vacation bible school and a summer play school hosted by a local preschool)
Playdate (when a friend has us/them over)
Picnic at the Park
Storytime (lots of book stores host these)
Library
Meet Daddy (sometimes we meet for lunch)
Going to a Movie (we love Regals free movie program)
Going out to Dinner
Leaving on a Trip!
Playgroup (there are several that we occasionally attend)
Party
Roaring Springs (our local water park)
Bank (they get to make deposits and my husband matches it, this means they have to do their chores)
Having Friends Over
Working on Goals
Volleyballin’ (sometimes I meet up with friends to play)
Water Day (there are lots of fun pools, splash parks, and beaches on the lakes or rivers)

And here is how they look once I cut them, punched a hole in the top, and put a piece of jute rope through the hole (this makes it easy to pull them out of the envelope).

Next, make a pocket for them.

Fold a piece of cardstock and staple the sides. Make a label for the front and distress it with an ink pad, then punch a hole and tie on an 18 inch piece of jute rope or ribbon (tie it onto the wide ribbon when you get to that point).


Then, to make your envelopes:
My SIL, Jen, and I shared a box of these from Office Max. I think there was 500 in the box. I printed the days of the week, distressed the edges with an ink pad, and glued them on. Then I punched a hole in the top and hung it from an 18 inch piece of jute rope or ribbon.


At this point you could be done by just hanging the days of the week onto a thicker ribbon!

Or you can make the whole Welcome Summer Banner to make it SUPER cute.

Heres How:
First, get some chipboard shapes (they come in a "book" of 5) and some chipboard letters (or use vinyl).
I got mine at Michaels, but I heard you can sometimes find them at Archivers in the $1 section.

Mod Podge decorative paper onto them, turn them over and cut the excess paper off with an exacto knife.


Then sand them to get the edges nice and smooth. Distress them with an ink pad if desired. Glue the chipboard letters on to make your words.

Punch holes in the tops and hang onto a wide ribbon.


Leave enough room on the ends of your wide ribbon to hang. String one or two ribbons through your chipboard and tie it to the larger ribbon.


My kids LOVE to take the tags out and see what is in store for the day and the week!
Your kiddos will enjoy a Summer of Fun with an easy to follow plan!

~Angela
secretsofasupermommy.blogspot.com

Pin It!

Wednesday, June 2, 2010

No Sew Felt Library Bags

This summer, we are planning to head to our local library for their Summer Reading Program. I think it is SUPER important to make sure your kiddos keep learning, even when they are out of school for the summer. I decided to make each of my boys a library bag to use this summer. Hopefully these bags will make our trips to the library easier, and teach my boys a little bit about responsibility!
These No Sew Felt Library Bags are SUPER simple to make...no sewing machine required! All you need is felt, ribbon, a hot glue gun, and pinking shears or scissors.
*********************
1. Decide how big you want your bags to be....mine are 12 inches tall by 14 inches wide. Lay out your felt and measure the width of the bag and two times the length. Use your pinking shears {scissors are okay too...pinking shears just make the edge more decorative} to cut a rectangle...mine was 24 inches by 14 inches.
2. Find the center of the length, and fold the felt in half. Use your hot glue gun and glue the edges of the bag together, starting closest to the fold and working your way up to the top of the bag {where the opening will be}. Do this on both the left and right edges of the bag.
3. Use a hole punch {or you can cut a small hole with your scissors} to mark the places at the top of the bag where you want the handles to be. I punched two holes on the front side of the bag and two holes on the back side of the bag. I measured approximately 1/3 of the width over from each edge so that the handles would be evenly spaced.
4. Use ribbon to make the handles of the bag. You will need two pieces of ribbon cut the same length {one for the front and one for the back}. They can be as long or as short as you would like. To attach the handles, pull the ribbon through the holes from the inside of the bag and then tie a knot on the outside. Then pull the other end of the same piece of ribbon through the other hole and tie a knot in it. Repeat the same process to make a handle on the back side of the bag too. I used a little bit of hot glue to hold the knot in place and make the handles a little stronger.
5. Use your ribbon and lay out the letter that you want to put on your bag. Then use your hot glue gun to attach the ribbon to the front of the bag. Cutting your ribbon with pinking shears keeps it from fraying and makes the letter a little more decorative.
After about 10 minutes and a little bit of hot glue, you end up with a SUPER cute, No Sew Felt Library bag!


Visit thecsiproject.com
Pin It!

6 Days of Summer Fun! Day Two: No Sew Felt Library Bags

6DaysofSummerFunwiththeSUPERMOMS

These No Sew Felt Library Bags are SUPER simple to make...no sewing machine required! All you need is felt, ribbon, a hot glue gun, and pinking shears or scissors. To learn how to make one of these cute bags for your kiddos, go check out my step by step directions at Secrets of a Super Mommy!

Pin It!

Tuesday, June 1, 2010

6 Days of Summer Fun! Day One: Liven Up that Lemonade Stand!

6DaysofSummerFunwiththeSUPERMOMS
**This post is by Angela at Secrets of a Super Mommy!**
Every Kid LOVES to host a Lemonade Stand! But I remember mine being a big flop! It was rare that anyone would come and if a few friends did happen to come by, they didnt ever have money! So I promised my kids we would have a Lemonade Stand but I set out to make it SUPER!

Here are my ideas that helped to
Liven up that Lemonade Stand!

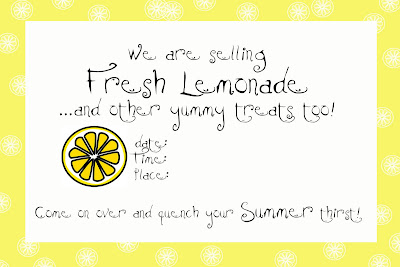
1. First you have to get the word out! Deliver invitations to the neighborhood friends! You can make them as simple as needed. Just let your kiddos use paper and markers or save a copy and print mine. Just fill it in and trim the edges with decorative scissors.

2. Hand out FAKE money with the invitations. We gave our friends enough that they could each buy 1 of every item on the "menu." You can create your pages of money and print them here.

3. Let your kiddos help get everything ready!

The Food. Along with the Strawberry Lemonade, we had popsicles, cookies, fruit ke-bobs, popcorn, and small candy. Everything was really simple. We served the popcorn in coffee filters, and everything else was set out on trays (except the popsicles, which were in the cooler).

The Menu Sign. Most of the kids that came to our Lemonade Stand couldn't read anyway but we had fun making the signs together with a roll of paper from our easel and markers. I LOVED the spelling!! I recently found some fun printables that you could customize here (there is even a cute printable door hanger invite!)

The Set Up. We have a little plastic play house that was perfect to serve from, but all you really need is a little table (our table was behind the playhouse). Let the kids set up the chairs, put on table clothes, and hang the signs.

4. Break out a cash box or toy cash register and let your kids sell until they are ready for a drink! Then be sure to let their friends have a turn selling too.

5. Set up an umbrella, chairs, and blankets to sit on...so everyone can hang out and play for a while.

Our Lemonade Stand was so much fun that my Super Mommy neighbors kept the fun going and had the neighborhood over for a
Snow Cone Stand, and then later in the fall, a Hot Chocolate Stand!

I hope this helps you Liven up Your Lemonade Stand this Summer! Stay tuned for more awesome posts from Kelli and I all week!
~Angela
Pin It!

Friday, May 28, 2010

Starting the Summer Off with a...

BANG CRACK!
Henry had a little difficulty with the monkey bars Wednesday morning.{this is a picture from January...not this week}
And now he will be wearing a cast on his left arm for the next two weeks!
The doctor said his arm wasn't broken, probably just cracked. They put a cast on to protect his arm and to help it heal more quickly.
We go back in two weeks to get his cast taken off and to take more x-rays.
But for now, Henry will be sporting a neon green cast and avoiding the pool:)

P.S. Don't forget to enter FREE 4 All Friday today!

Pin It!

FREE 4 All Friday!

This giveaway is closed.
Congrats to Alicia for winning this weeks FREE 4 All Friday giveaway!
FREE4AllFridays!
It's the fourth Friday of the month.
That means it's my turn to host FREE 4 All Fridays!
Because everybody likes free stuff, right!?!
*******************
This week I am giving away a Natural Remedy Outdoor Survival Kit from Burt's Bees!
It has a ton of great stuff to help you enjoy the great outdoors, naturally!

And along with the Survival Kit, I also have an adorable book full of beautiful flower drawings and inspirational quotes.

I seriously wish I had art in my house that looked like the pages of this book!

To enter:
Leave a comment telling me what fun outdoor stuff you have planned for this summer.

For another entry, follow my blog and leave me a comment telling me that you do.

For a third entry, place my blog button on your blog and then leave a comment telling that you did.

For another entry, follow me on twitter, and leave a comment telling me that you do.

For one more entry, stop by Mimi's place and tell her "HI" too!

& since I just recently added my social media buttons to my blog, you get 5 extra entries for either becoming my friend on facebook or for subscribing to my blog feed. Make sure to leave 5 separate comments so they all count!

That is up to 10 chances to win:)

I will use random.org to pick a winner on Sunday! Good Luck and thanks for entering!

Pin It!

Thursday, May 27, 2010

Blog Swap: Jen from Larsenloves!

Hello Random Thoughts of a SUPERMOM Fans~ I am Jennie, or some know me as JenGlamGirl, and I am from Larsenloves. I AM THRILLED to be spotlighting my blog today on KELLI's blog. Kelli is very talented and I just love seeing her creations. She is also a busy mom of three darling boys, that have the cutest names ever. I enjoy seeing pics. of all her creations, and posts about her life as a SUPER mom. I am honored to be on Kelli's blog today.


My family this past Easter Sunday.


A little about me, I married my blind date (by big brother approval) his name is Kevin and we have been married for 10 years going on 11. We have three children together Preston 8, Arabella 4, and Ryker 15 mos. Together we live in beautiful Southern Utah. I stay at home with my dumplings and keep busy with them. As well as many crafts, projects, diy days, decorating, cooking, and of course blogging. Let me share just some of the things I enjoy doing, creating, and sprucing, and then blogging them ;)

I will start you off, by showing you this chair and table my hunny and I re-finished a little over a year ago. It was light oak on top and the base and chairs were a aqua country blue, with big blue and white gingham cushions. I told the hun, that I wanted black and dark walnut. We HE worked hard, but I helped too!


Here is a DIY picture arrangment or grouping I put together in my hallway nook. I "ADORE" my children. This was a very populare post and even was featured on Somehwhat Simple. ;)


One large DIY project I did, was finding this huge shelf on Craigslist in knotty pine and then painting, painting, touching up, and sanding it. Its a treasure I sure enjoy, as well as changing it out and decorating it for the holidays.


I love LOVE to decorate, and will show you my decorations in hopes to inspire. ;) I especially show my decorations during the holidays. I love to decorate my entry table, here is my Entry table as of now.


Another DIY project I did was prime, paint, decoupage, and vinyl my daughters headboard.


I love to craft, and just recently opened up a craft blog Craftomaniac.blogspot.com SO FOR those of you who enjoy crafts, and crafts blogs are more your speed, I would love for you to come check me out. However, all my home decor, DIY, decorating, Fashion Fridays, and many more things including all things Larsen... will be on LarsenLoves.
here are a few crafts on my craft blog. Mod Podged napkin styrofoam balls.


decorated plates with craft paper.


I offer a few other fun things on my blog during the week, like Sweet Saturday Somethings, Fashion Fridays (everyother Friday) This and That Thursday, and Wordless Wednesdays.... There will always be silly fun updates and pics. on the fam. too.

here is an example:


Doll up the eyes, with color!


This and That Thursday is a really fun post I do every other Thursday, in fact I do it on the week that I don't do Fashion Fridays. It's a post of all things I find THAT THIS gal love's or like's.


Here is an Example of one of my Wordless Wednesdays~ "PRETTY IN PINK"


I sure hope you all come visit me at LarsenLoves, I would be thrilled and flattered if you followed me too!

AND A GIANT THANK YOU AGAIN TO KELLI!!! ;)

I'm over at Jen's place today, so hop over there and leave me some comment love:)

Pin It!
Related Posts Plugin for WordPress, Blogger...