I bought this gorgeous handmade wooden and metal cross last year at an arts and crafts festival. At 6:00 am in the morning under very dim light, the color on it looked like a perfect match for my bedroom. Unfortunately when I got home the color just wasn't right...but I didn't know for sure what I wanted to do about it. Last month when I decided to start redecorating my master bedroom {remember I added black, white, and red into my turquoise room}, I knew the the best solution for the cross was a coat of red spray paint.
After I spent more than a few minutes trying to cover the white cross with painters tape, my genuis husband shared with me that he thought the pieces would all come apart. And they did! So I pulled off all the painters tape and got ready to spray paint just the blue cross!
Now the only problem was the metal nail heads on the blue cross, which I definetly didn't want to paint over. Again Jason came to the rescue with an idea. Apparently you can cover anything metal with Vaseline before you spray paint and that will prevent the spray paint from getting on it...and to remove it all you do is wipe it off after the paint has dried! Genius idea right!?!
So I used a Q-tip and carefully applied Vaseline to all the nail heads being careful not to get it on the cross.
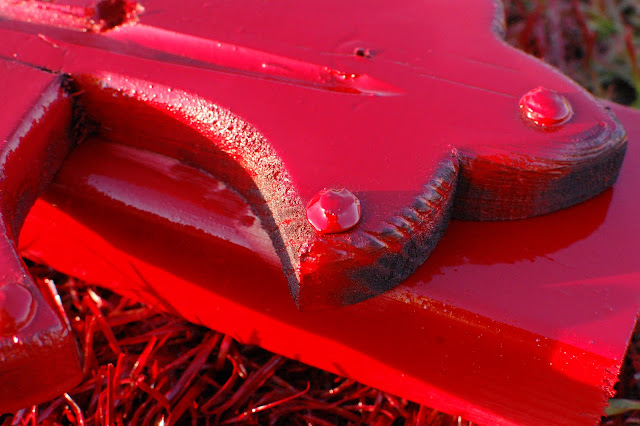
I sprayed the cross down with a liberal coat of Krylon Cherry Red spray paint. Check out how the paint just sat on top of the Vaseline coated nail heads!
After the paint dried for about 30 minutes I simply used a paper towel and wiped the now red Vaseline off of the nail heads. Seriously check out how well that little spray paint tip worked!
Here is how the {reassembled} newly painted cross looks against the turquoise walls in my bedroom...not too bad! Now I just have to decide exactly where I want to hang it:)
I have another fun spray paint project that I am sharing as a guest post next week too!
Have you done any spray painting lately?!?


18 comments:
I'm partial to red but it really is gorgeous! I love the "layers".
This is GREAT! Love it!!!
Your husband is a genius! It looks great.
It looks so good! What a neat trick! It will look great in your room!
VERY Cool! great post on this. I am a folk artist..I found you through Kelly at "Till Death Do Us Part " blog Im going to be a follower please check my blog out sometime! :)
Kat Griffin
Good tip! Vaseline - Who knew?! :) I'm sure I'll be using this trick soon!
What a before and after! Good job, it looks great.
Great tip, who would have thought to use Vaseline? I found you through Tatertots & Jello. Sweet blog!
Great job and wonderful tip! I will definitely have to remember that one. Thanks for sharing!
Great tip! I've never tried that:)
Also, your the winner of my giveaway!! Please email me your address & I'll ship it out :D
Wow, that looks beautiful!! And yes..great tip! I never knew!
Kelli - Fantastic Makeover - I adore the new colors. Thanks for sharing - Hope you had a wonderful weekend!
~Stephanie Lynn
www.bystephanielynn.com
That turned out really pretty!
Fantastic makeover, and that Vaseline idea is pure genius!
That's lovely!
I like the metal cross, but the layering really makes it pop!
This looks SO SO COOL!!! I LOVE IT!!! :)
www.iheartmygluegun.com
Your cross turned out great! I love the Vaseline tip--thanks for sharing.
what a cool trick this is definitely going to come in handy!
ps I shared your nutter fluffer idea on my blog today, I can't wait to try it http://raegunwear.blogspot.com
Post a Comment