Wednesday, June 9, 2010
Tuesday, June 8, 2010
End Table Redo
 I used Zinsser Oil based primer {the stain blocker, bond coat kind} to do my first coat. This stuff is amazing....no need to sand down previously finished furniture, because it will stick to any glossy surface. The table is looking better already.
 After the primer was dry, I put on a few coats of my favorite spray paint {Krylon Bahama Sea}! I loved the color, but it was just a little too bright.
So, I tried my hand at glazing for the first time. I took some left over black trim paint and watered it down...approximately one part water to three parts paint. I used a paint brush to apply the watery paint and an old tshirt to wipe it off. I made sure to let the glaze sit a little longer on the trim pieces so that it got into all the little details.


Monday, June 7, 2010
6 Days of Summer Fun with the SUPERMOMS!

We wrapped up the week yesterday, but I wanted to post a recap of all 6 days just incase you missed any of the SUPER fun summer ideas!
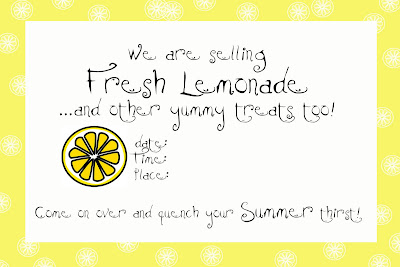
Day One: Liven Up That Lemonade Stand


Day Four: Rainbow Pudding Pops

Day Six: Upcycled Sand Toys
Thanks so much to Angela at Secrets of a Super Mommy for helping make this week so great!
If you decide to try out any of our SUPER fun summer ideas, please send me a link or a few pictures and I will feature some of your projects on my blog throughout the summer.
Now go make your summer SUPER fun!

Upcycled Sand Toys
 There are four main reasons that I love this project:
*Next*, you will need a net produce bag. Mine is from a small bag of lemons, but you could use the bigger ones that oranges come in. Use a piece of duct tape and cover the label of the produce bag. Use that space to write your child's name or to decorate the bag a little with a permanent marker.
 Once your bag is finished, head to the beach, the sandbox, or the playground!
  When it is time to leave, clean up is SUPER easy. At the beach, place all your toys back in the bag and dip it a few times into the water. If you are playing at the sandbox, a good spray with the water hose will get rid of most of the sand.


Sunday, June 6, 2010
6 Days of Summer Fun! Day Six: Upcycled Sand Toys


Tonight I will post a Summer Fun Wrap Up and give you a chance to share some of your summer fun projects!

Saturday, June 5, 2010
6 Days of Summer Fun! Day Five: Backyard Campout

The Perfect Fireless Campfire!
Just let the kids create their own little camp fire with some colored paper, crepe paper, and glue.
However they make it is just right!
Then give them skewer sticks (you may want to cut the sharp tips off) and a bag of marshmallows to "roast."
This will keep them busy for about as long as the bag of marshmallows lasts : )
You can even make them into real S'mores in the Microwave!

Enjoy!
~Angela
secretsofasupermommy.blogspot.com

Friday, June 4, 2010
Rainbow Pudding Pops!

 Have one of your helpers pour the pudding mix into your biggest mixing bowl.
 Have another helper pour in the milk. Make sure to follow the directions on your package of pudding.
 Once the pudding is mixed according to the directions, evenly separate it into 5 or 6 smaller bowls.
 Add in red, orange, yellow, green, blue {and you can do purple...my boys didn't want it} food coloring to your divided up pudding. Then get a little help stirring until the pudding is the color that you want.
 Spoon the different colors of pudding into your cups. Try to do smooth and even layers so that you will see a good rainbow on the sides of the pudding pop. Have one of your helpers put a popsicle stick into each of the cups of pudding. The pudding should be thick enough to hold up the stick...if not, cover the cup with plastic wrap and then put the stick through the plastic wrap and into the pudding.
 Place the pudding pops in the freezer for a few hours. The time will depend on the size of your cups.
 After they are completely set, take the pudding pops out of the freezer. Use your hands to warm up the sides of the cup so that the pudding pop will come out of the cup easily.
 Then enjoy {& try not to make too big of a mess with} your SUPER cute and SUPER yummy treat!


6 Days of Summer Fun! Day Four: Rainbow Pudding Pops


