Home AboutMe Crafts Food

Thursday, December 2, 2010

Glittered Snowman Ornament Two Ways

{This is a tutorial that I shared over at Under the Table and Dreaming last week.}
Today I am sharing a tutorial with you on how to make a SUPER cute Glittered Snowman Ornament...two ways!
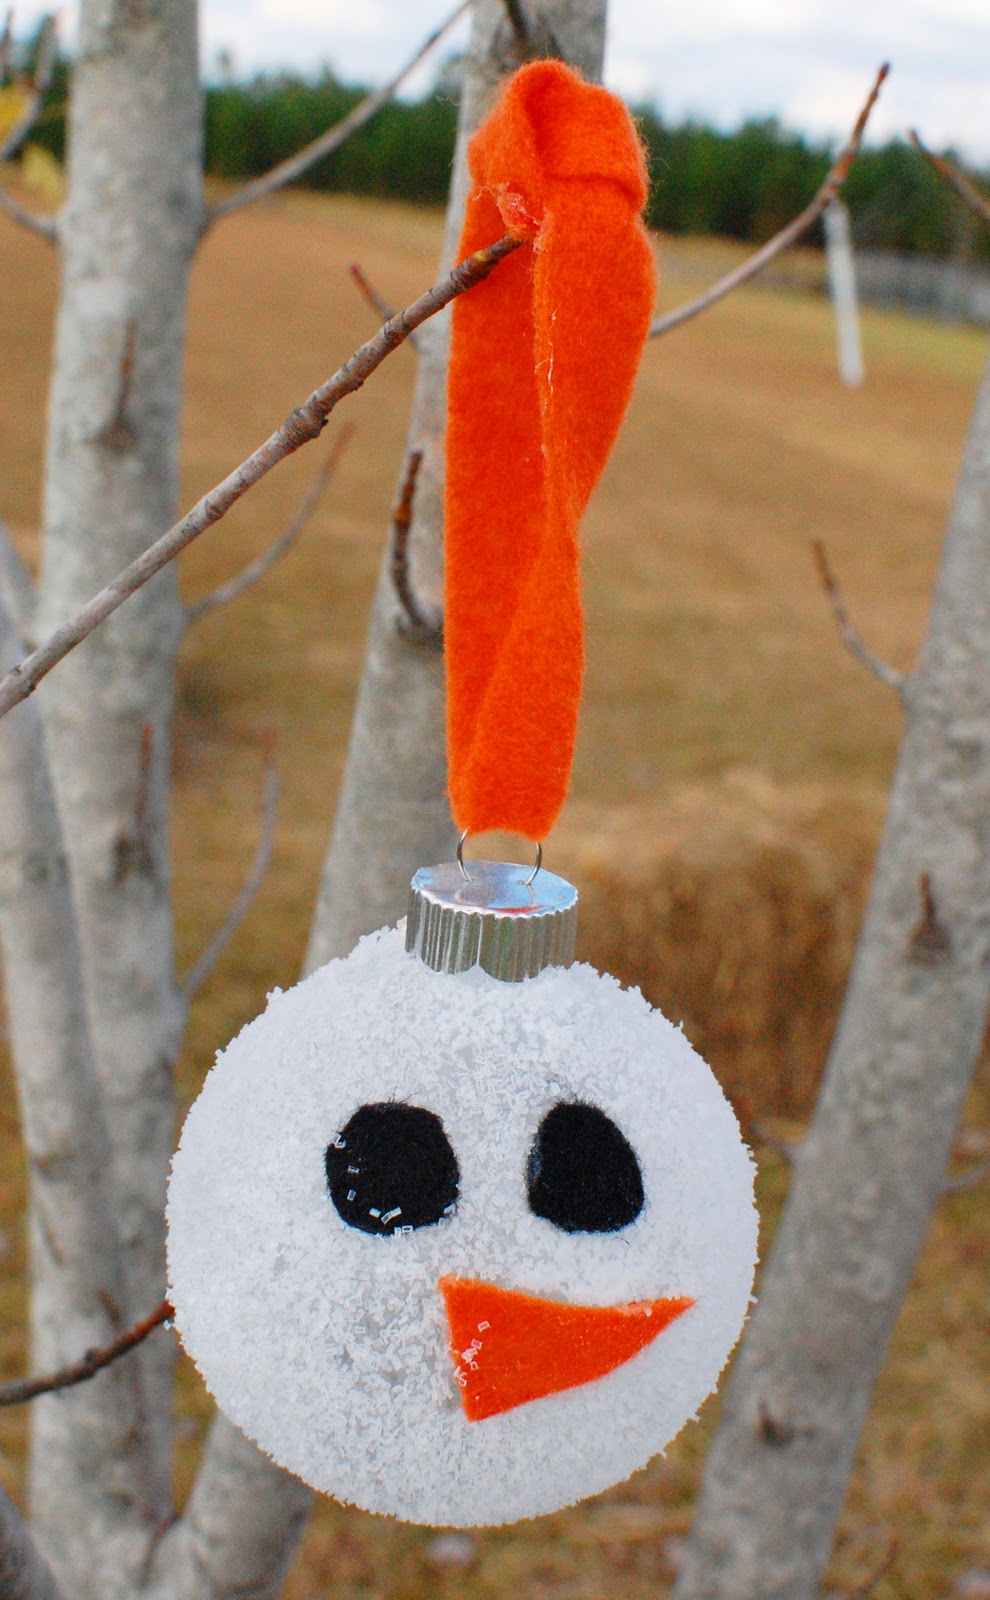
Glittered Snowman Ornament: Version One

You will need:
a clear glass ornament
black and orange felt
Mod Podge
foam brush
white glitter
clear gloss spray paint
Cut out two round black eyes and one orange triangle from your felt, then attach the felt pieces to the ornament using a hot glue gun. Using a foam brush apply Mod Podge to the ornament being careful not to get any on the felt pieces. Cover the entire ornament with glitter and shake off any excess. Spray a light coat of clear spray paint onto the ornament to help set the glitter.
Tie on a piece of felt for a hanger, and you have a SUPER cute Glittered Snowman Ornament!
********************
Now if you are like me, and you have more than a few curious little hands running around your house...and the thought of a glittered ornament brings visions of you & the vacuum cleaner being really good friends, then this second version of my Glittered Snowman Ornament is for YOU!

Glittered Snowman Ornament: Version Two

You will need:
a clear glass ornament {this could be done with plastic too to make it even more kid friendly}
Mod Podge
white glitter
black and orange Sharpies
Use the Sharpies and draw on two round black eyes and one orange triangle nose...I added in a cute smile too! Dilute a little bit of Mod Podge with a few drops of water, then add pour it into the ornament.
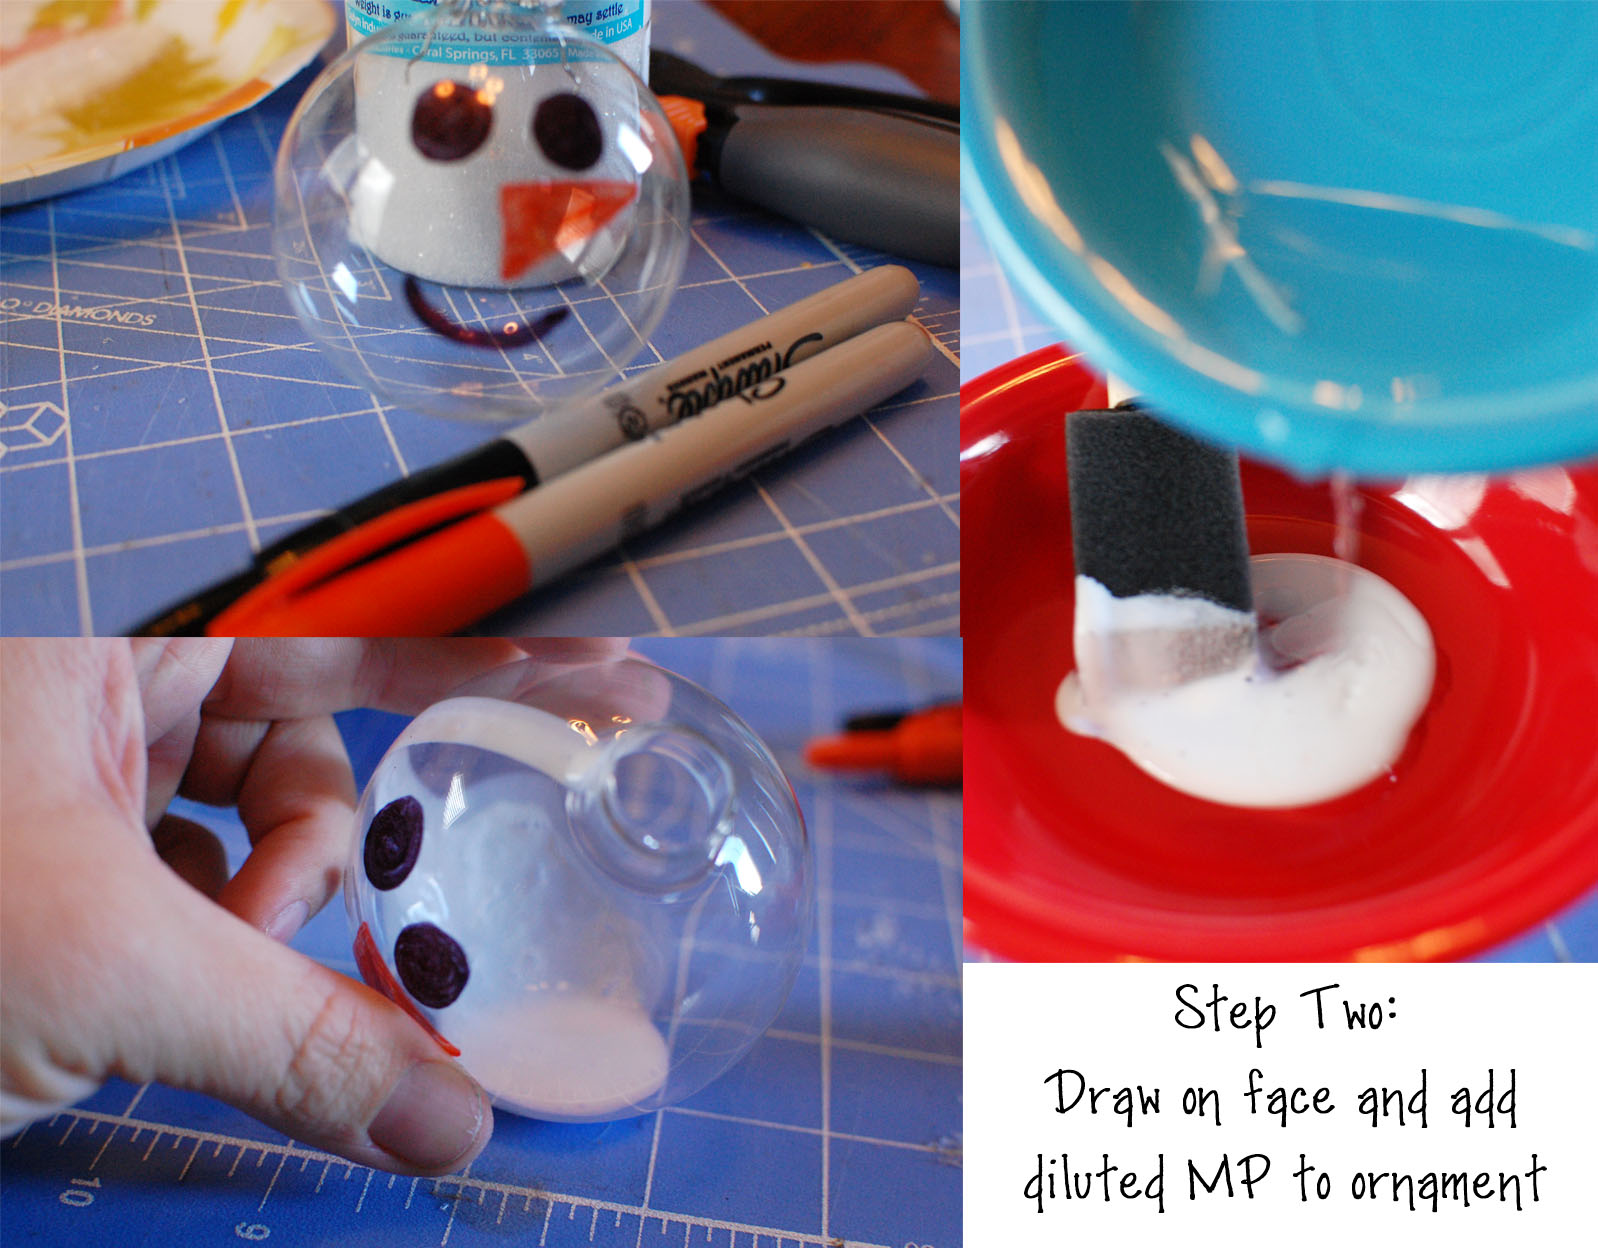
 Use your finger to cover the opening of the ornament and shake around the Mod Podge making sure to coat the entire inside surface of the ornament. Pour in some of your white glitter and shake it around {again making sure to coat the entire inside surface of the ornament}. Turn the ornament upside down and shake out any excess glitter.
Tie on some white yarn and you have a kid friendly version of a SUPER cute Glittered Snowman Ornament!


Pin It!

Tuesday, November 30, 2010

Christmas Advent Calendar Again

{This is a repost of my advent calendar from last year.}
I have been wanting a cute advent calendar for a few years. We had the cheap felt one from Walmart for a few years, but it wasn't nearly as cute as it could have been....so I decided to make my own. I did a little research online, and I got a ton of inspiration from other blogs and from Etsy! I took a few of the ideas that I found and mixed them all up and came up with my own advent calendar.

I hit up Hobby Lobby for
a canvas
wedding favor tins
scrapbook paper
and
a painted star

I already had some stuff at home
fabric
rick rack
mod podge
and
hot glue

I started by cutting out a lot of circle...48 to be exact. 24 without numbers for the inside of the tins.
24 with numbers for the outside of the tins.
I applied a thin layer of mod podge to the inside of the tin and to the inside of the lid. Then I place the unnumbered circles inside the tins and mod podged them in place.
I put the numbered circles in the lids {with the paper and number showing through the plastic} and then mod podged them into place. I cut out a Chrismas tree from leftover fabric and used spray adhesive to attach it to the canvas. I finished off the edges by hot glueing on some white rick rack.
After everything was dry, I put the lids on the tins and hot glued them to the fabric Christmas tree.
Starting on December 1st the boys will get to remove the lid to one tin a day and get a special treat that is inside. I also placed small pieces of paper with special Christmas activites {bake cookies, sing Christmas songs, wrap presents, watch a Christmas cartoon, read the Christmas story} for us to do in some of the tins.
Pin It!

Monday, November 29, 2010

C is for Appreciation....

...or maybe C is for Cookie!
If you have been around my blog long, you probably know that I like to show my appreciation with cookies:) So a few weeks ago when our church was celebrating Staff Appreciation Week, it was natural that I make cookies for our pastor {plus 3 associate pastors & the children's director}. Lucky for me Hobby Lobby was having an awesome sale...all glassware was 50%. I got some great cookie jars for $2.00 and $2.50 each!
After I filled the jars up with yummy peanut butter or chocolate chip cookies, I prettied them up with some black and white gingham ribbon and a cute red tag {thanks goodness for my Cricut}.
I also added a black vinyl initial to each of the jars just to make them a little more personal.
And hopefully the church staff now knows how much we appreciate all they do for us! 

Serenity Now Crafty Cutter Party
Pin It!

Friday, November 26, 2010

Project in Progress...

Besides eating lots of turkey and staying up all night to shop, I also spent part of the holiday week being productive. You may remember the old school desk that I picked up last year for only $5...I had big plans for all three school desks back in January. Well, it is November and I'm finally getting around to working on them.
They are painted....blue for Henry, green for Grant, and orange for Eli!
I've also added some chalkboard paint to the desk tops and I put the boys' names with on the backs with vinyl. I still want to add a few more fun details to make them a little more special. Hopefully I will use the rest of the weekend {if I'm not too wiped out from shopping all night} to finish these up and I can share them with you next week!

Did you do anything productive this week? Or did you just enjoy the holiday with family while eating lots of good food:) I hope everyone had a great Thanksgiving...and Happy Black Friday!
Pin It!
Related Posts Plugin for WordPress, Blogger...