Home AboutMe Crafts Food

Monday, July 11, 2011

Patio Makeover Reveal

After more than a month of work, I'm finally sharing our patio makeover with you {even though I still have two more projects to do for this to be complete}! I don't have a before picture mostly because our before patio was really sad...no shade, a rusty old table, and way too many toys crammed in one place! Now it is this bright and cheery space that I love!
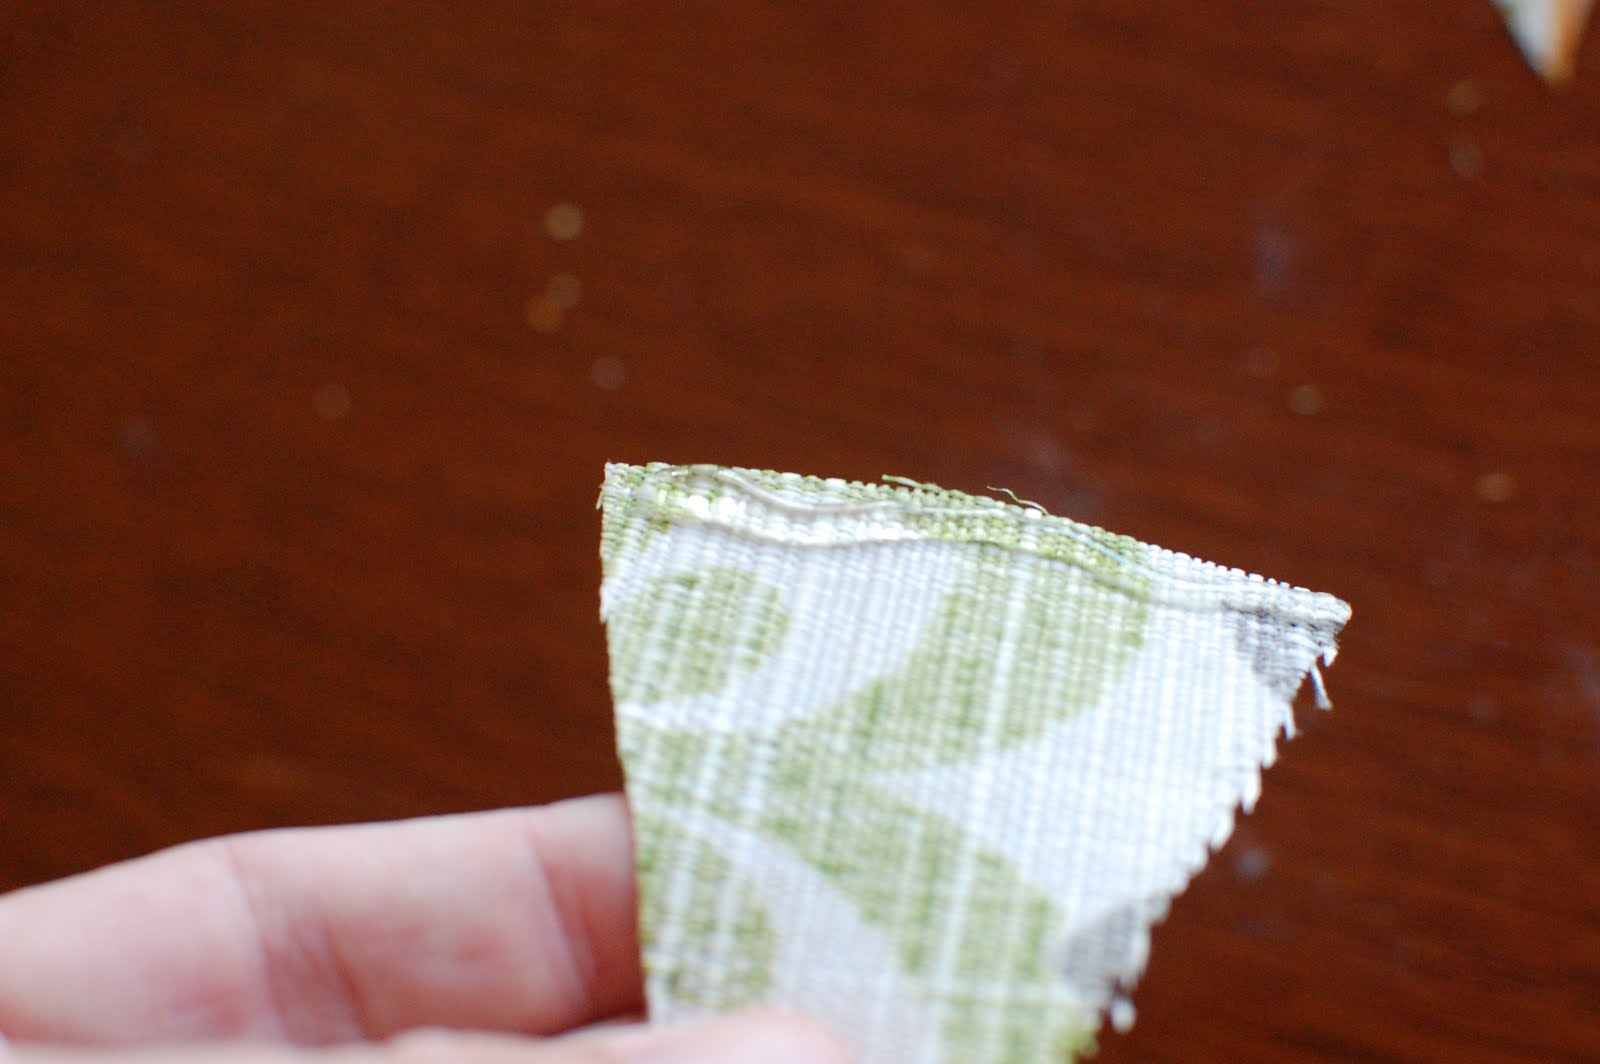
This whole project started because I wanted to add a little more shade to our backyard so the boys would be a little cooler playing in the backyard during the SUPER hot summer! We added the pergola a few years ago, but it never really gave us the shade that we were hoping for. So I hit the fabric store during an awesome outdoor fabric sale and bought a ton of fabric. I cut the fabric into strips {and hemmed each edge to keep it from fraying} then Jason weaved the fabric in and out of the braces of the pergola attaching it to the pergola with staples along the top edge.
Not only did the fabric add a ton of color to the space, but it created just the right amount of shade over the back patio without seeming like a full roof over it. We also added some outdoor lighting to the pergola so we can use it more at night too.
After all that color was added to the pergola, I decided we needed a new table with a little color too. We traded out our old rusty table for a new picnic table that is much more functional for little kids. The table came unfinished {we got it at Lowe's for less than $100} and I painted it with a coat of primer and then a coat of {Honeypot from Valspar I think} exterior paint.
To add just a little more color to the patio area, I also painted out white back door with the same yellow color.
Two of our old chairs got a new coat of black spray paint and I recovered the cushions with some of the scraps of outdoor fabric that I used on the pergola.
I've already shared out Outdoor Toy Organizer...
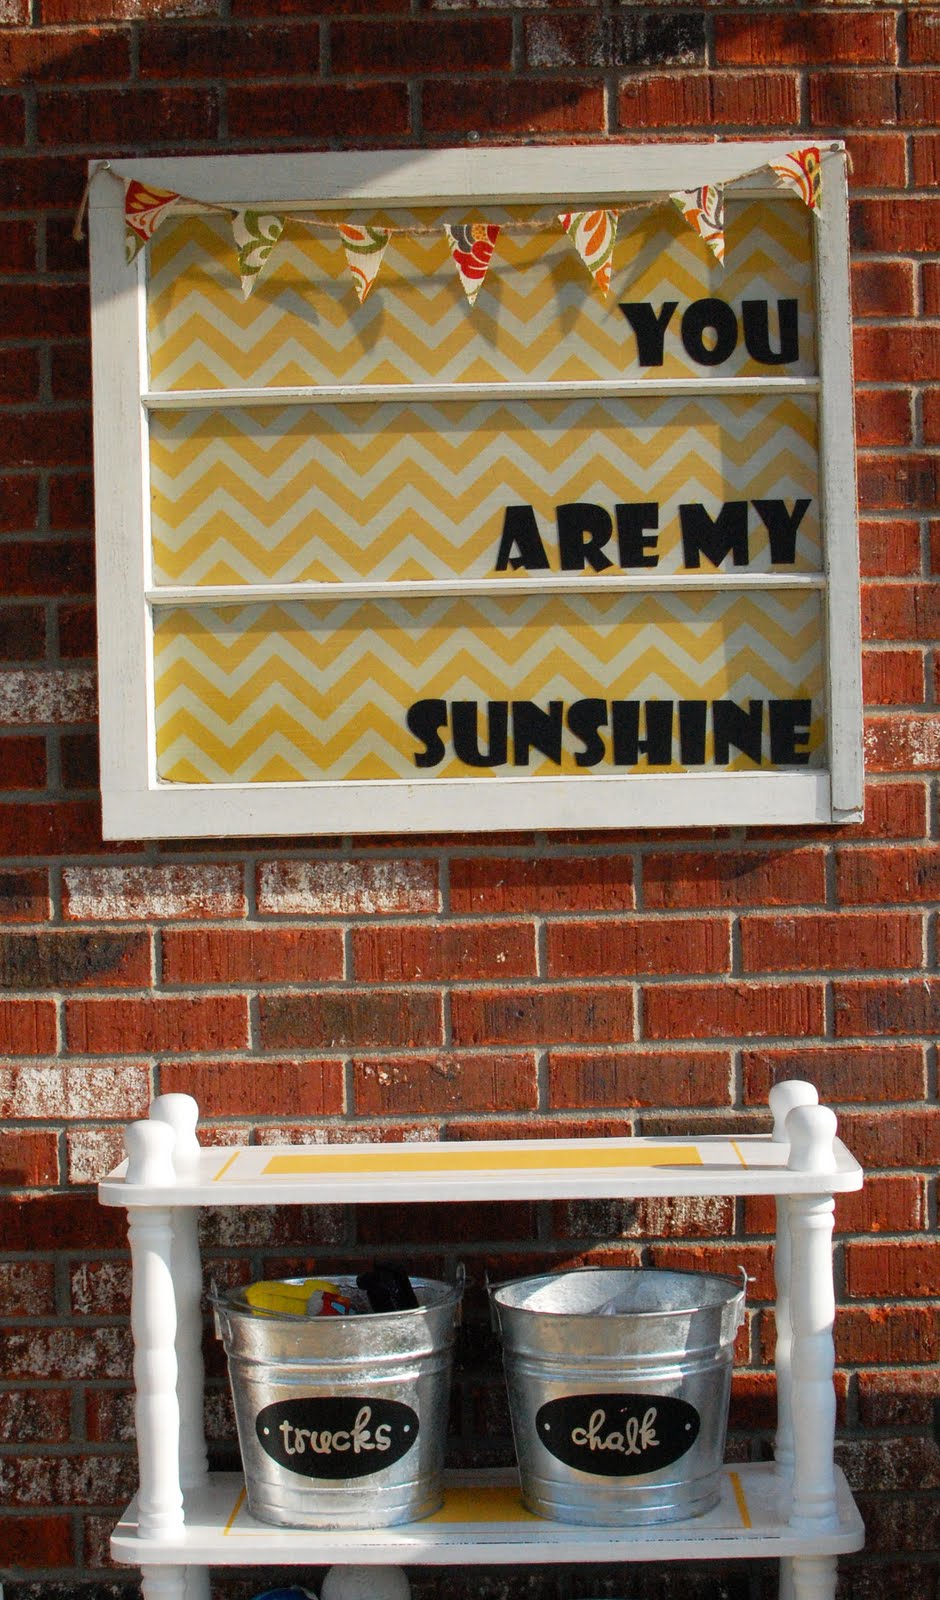
...and my old window turned outdoor wall art.
I also gave our old {and half way broken} patio box a makeover as well. It went from this:
to this:
{I'll share the step by step on how I turned this old patio box into a really cute bench tomorrow.}
We picked up a new light fixture for over the back door and I am still working on a chandelier creation to hang over the picnic table, but for now I am really pleased with how our new patio looks!


Best DIY Project of 2011 Contest - Not JUST A Simple Housewife
Pin It!

Thursday, July 7, 2011

Old Window to Outdoor Wall Art

Last week I shared a little sneak peak of our in progress patio makeover which included our outdoor toy organizer and a cute {but way too plain} window. I started with an old window {that had previous hung on the wall in the master bedroom} and I added some yellow and white fabric to the glass using spray adhesive and clear polyurethane.
The color was perfect and it added a little whimsy to the patio, but it was just too plain. So I decided to add a vinyl quote and some cute pennants!
I used my Silhouette to cut out a few pennant shapes from a scrap of leftover outdoor fabric.
 I added a line of hot glue to the back of each pennant...
 ...and then stuck them onto a piece of twine.
I used my Silhouette to cut out a quote on premium vinyl so that it would last outside in the elements {I used the same vinyl on the galvanized buckets too}. I decided on the quote "You are my sunshine" because I thought it went well with the sunshine-y yellow color of the chevron fabric:)
To finish up the project, I added the pennants to the window using a few thumbtacks, making sure that they didn't hang low enough to cover up the vinyl lettering.
The boys and I are heading to the hardware store this morning to pick up the last {hopefully} few things I need to put the finishing touches on the patio. If all goes well {meaning if I can manage to work the drill by myself} I should have some pictures of the completely project to share tomorrow.
Go HERE to see the completed patio makeover.
Weekend Bloggy Reading Visit thecsiproject.com
Pin It!

Monday, July 4, 2011

Happy 4th of July!

We spent the weekend in the mountains of Alabama....
hiking to waterfalls
swimming for hours
eating bbq and fried fish
playing with cousins
decorating cupcakes
not using our cell phones
catching {really small} fish
celebrating a 1st birthday
&
watching fireworks!
***************
Today we are heading over to my parents' for more bbq and swimming.
I hope you all have a wonderful day celebrating our nation's independence!
Pin It!

Friday, July 1, 2011

Inside Out S'mores

Nothing says summer is here better to me than a warm, melty, gooey, chocolaty s'more! One of the best things about a s'more is that there are a ton of different ways to make them!

See, I told you! A ton of different ways to make them!
But an inside out s'mores is one thing I haven't seen...at least not the way I made them anyway:)
*******
To make Inside Out S'mores, you start with a JUMBO sized marshmallow {I picked these up at our local grocery store, but I have seen them at both Target and Walmart this summer so they should be pretty easy to find.}, mini teddy grahams, and some milk chocolate chips.
Using a very sharp knife, cut a slit into the top of the marshmallow being careful not to cut all the way through to the bottom. I was surprised at how easy it was to cut through the marshmallow even though it did get the knife pretty sticky. You can clean your knife in warm water after each marshmallow to make cutting them easier.
Stuff your marshmallow full of chocolate chips and broken up pieces of mini teddy grahams. Any kind of graham cracker will work and you could even try graham cracker crumbs, the mini teddy graham were just the perfect size for stuffing my jumbo sized marshmallows.
Another variation I tried was Nutella and broken pretzel pieces....YUM! It would also be really yummy to stuff small pieces of Snickers or Reece's cups inside your marshmallows too, but those aren't technically s'mores so we'll save them for another post:)
After you stuff your marshmallow, seal it up by squishing the cut edges together. Then put your marshmallow onto a roasting stick in the opposite direction that you cut your marshmallow.
Roast your marshmallow over a campfire or your gas kitchen burner until it is warm, melty, and gooey!
You can eat your Inside Out S'more right off of the roasting stick or eat it with your hands {and get your fingers good and sticky}! Either way the yummy melted filling makes these s'more a ton of fun and impossible to resist eating at least three:)

What is your favorite way to eat a s'more?
Pin It!
Related Posts Plugin for WordPress, Blogger...