Home AboutMe Crafts Food

Thursday, November 17, 2011

Pilgrim and Indian Initial Tees

I have shared countless times about my slight obsession love of crafty kids' holiday shirts. I'm actually starting to think that maybe I should start a support group, but I might be the only crazy member! Anyway, with Thanksgiving only a week away, I decided to take advantage of our little sick day yesterday and get some sewing done on the boys' shirts for this year. I knew I wanted to attempt a cute turkey face shirt for Eli {I'll share his shirt later after I figure out how to add the eyes without making the turkey look crazy}, but I wasn't quite sure about what to do for Henry and Grant. I stumbled across a Pilgrim initial tee on Etsy earlier this week and as soon as I saw it I knew my boys were getting Pilgrim and Indian shirts this year:)
I won't bore you with all the details{and a million pictures} of how I made these shirts...you can go back and check out one of my other step by step tutorials if you like. But just so this isn't a single picture with a ton of rambling, I will share a quick rundown of how I made these.

**Print out each kiddos initial {mirrored} and attach it to orange and white gingham.**
**Cut out the letters and attach them to some orange felt.**
**Sew the letters to the felt with a zig-zag stitch and then cut around each letter leaving an orange border.**
**Use spray adhesive to hold the letter to the shirt, then stitch around the letter to attach it.**
**Make the pilgrim hat and indian headband out of scraps of felt. **
**Use spray adhesive to hold them in place and then sew them onto the shirts.** 

Really the hardest parts of this project are deciding which font to use for the letters and getting the proportions of the hat right so that it looks like a Pilgrim's hat and not a crazy top hat:) For those of you that don't sew, you could also make this no sew with some ultra hold iron on adhesive! Except for the new white long sleeve shirts, I used all materials that were in my craft stash making these shirts cost around $5 each. Not too bad for two SUPER cute Thanksgiving shirts!
Weekend Bloggy Reading
Pin It!

Monday, November 14, 2011

Using Actions for Photoshop Elements to Edit Your Photos

I've had a DSLR camera for a few years now, and having a nicer camera {even though mine is the the bottom of the line Nikon D40} really has improved my photos. Besides the fact that the quality of the photo is better, having a DSLR makes me think out the composition and lighting of my photos a lot more than when I simply used a point and shoot digital camera. But having a good camera is only the first step in taking great photos...you also have to know how to edit pictures to get the most out of each shot!

There are more than a few editing programs out there, some are outrageously expensive and some {like the one I have} are more affordable. I use Photoshop Elements for all my editing. I bought it when we got our new laptop a few years ago, and I think it cost somewhere between $80 and $100. The only problem with photo editing programs is you really need to know how to use a them to get the most out of them...and it can be quite complicated to figure out!

My biggest help in using PSE to edit my photos was when I discovered Actions! And even better I found some really awesome FREE Actions! I've downloaded free Actions from two websites {and I'm sure there are lots more out there too} : The CoffeeShop Blog and The Pioneer Woman. Having these actions has really helped me improve my pictures! I love all the different options that both of these websites provide, and I love the different feel you can get just by clicking a few buttons!

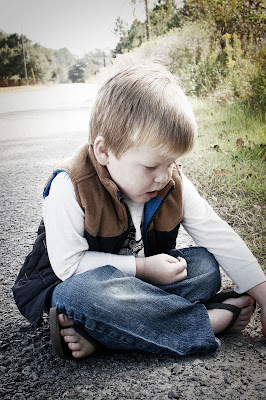
Just to show you what Actions can do for your photos, here are a few straight out the camera shots along with some shot that I edited with the free PSE Actions that I downloaded. I am not an expert with these by any means, and I honestly can't remember the names of the Actions that I used for each picture. I usually just click an Action and see how I like it with the photo. If I don't like it, I just click undo and start over. These next three photos were all edited with The Pioneer Woman Actions, but you can see some photos that I edited with The CoffeeShop Blog Actions HERE.

                             SOOC                                                                              Edited with PSE Actions


{{Can you tell I like taking pictures in this spot!}}
I'm sure there are a few professional photographers cringing at my overeditednotverygood photos, but I think they look pretty great for a self taught phtotographer with SUPER squirmy kids! IF you are looking for a way to edit your photos without blowing the bank {or blowing your mind}, check out PSE. The abundance of free downloadable Actions totally make Photoshop Elements worth the initial cost.

{FYI I wasn't paid to share any of this with you even thought I know it sounds kind of like a sales pitch:) I really have been having a ton of fun editing my picture {including the photos that I used with my Thankful Photo Decor} with these free Actions lately and I thought you might want to know about them too!}

Pin It!
Related Posts Plugin for WordPress, Blogger...