Home AboutMe Crafts Food
Showing posts with label Crafts. Show all posts

Monday, August 22, 2011

Guest Post: Felt Napkin Rings

Hello, Random Thoughts of a Supermom readers.  I’m Paula from Sweet Pea and I’m delighted to be guest posting today for Kelli.

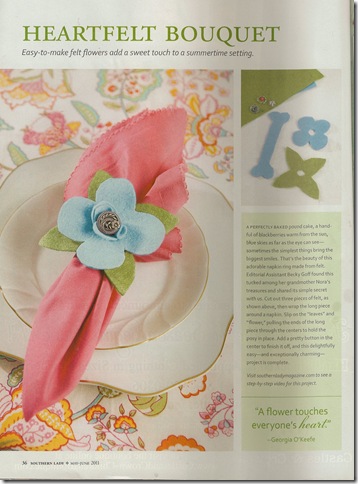
When I was a child, I remember my mom and grandmother making felt napkin rings as party favors.  I never forgot them and always wondered how they were made.  This spring in Southern Lady Magazine, there was a feature on these cute napkin rings that I so fondly remembered, but no instructions.  Following the picture in the magazine, I figured out how to make them.
SL


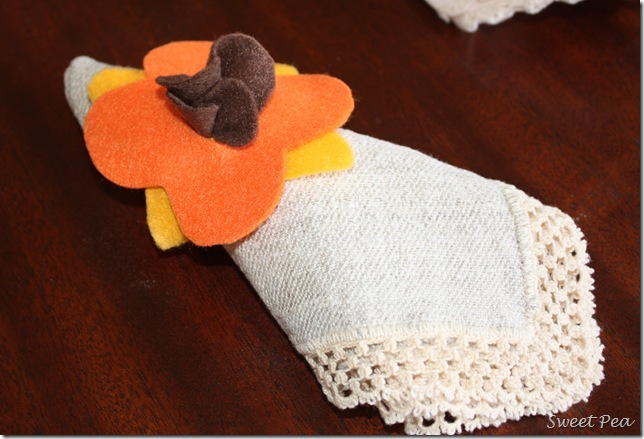
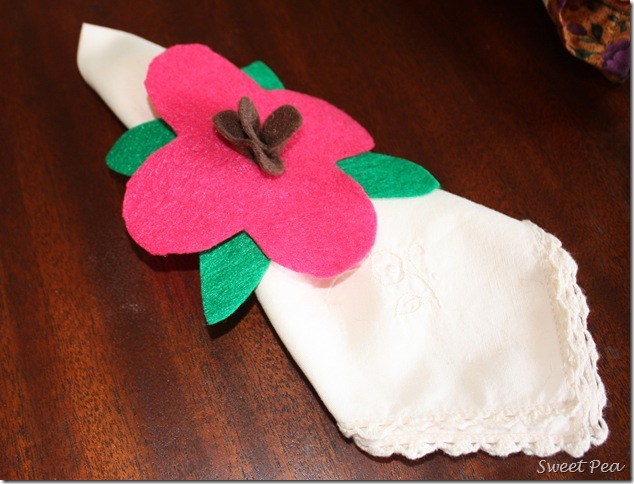
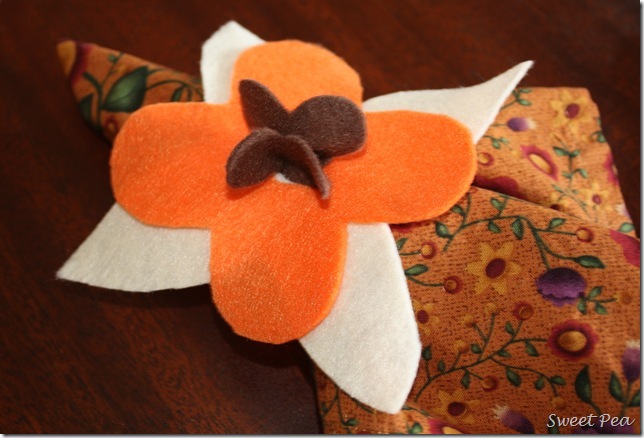
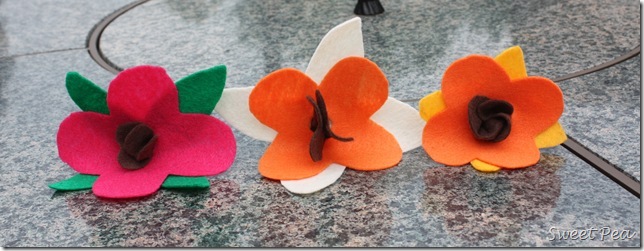
I played around with felt and came up with these three samples.
Example1

Example3
Example2


Aren’t they fun?  Would you like to make some?  I thought you would! 

Supplies Needed:
Felt in colors of your choice
Scissors and/or rotary cutter
Ruler
Sewing pins


Make the Napkin Ring:

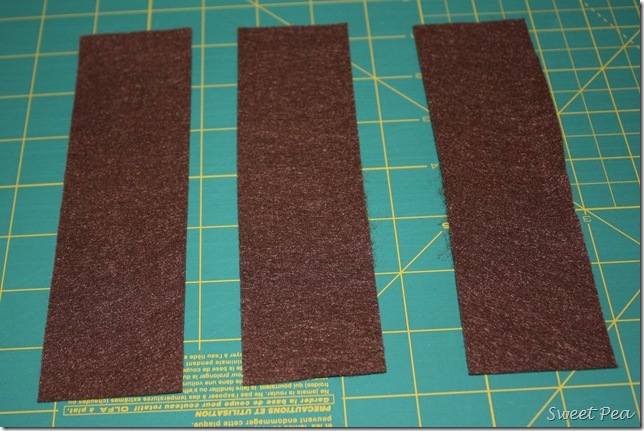
Make the napkin ring which also becomes the center of the felt flower by cutting 7” x 2” strips.  (My pictures show three strips.  Cut as many strips as you need to make your desired number of completed napkin rings.)
Ring1


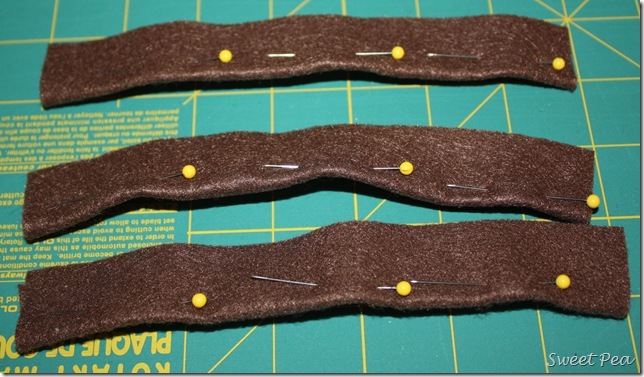
Fold each strip in half and secure with pins.  This will make cutting the felt much easier.
Ring2


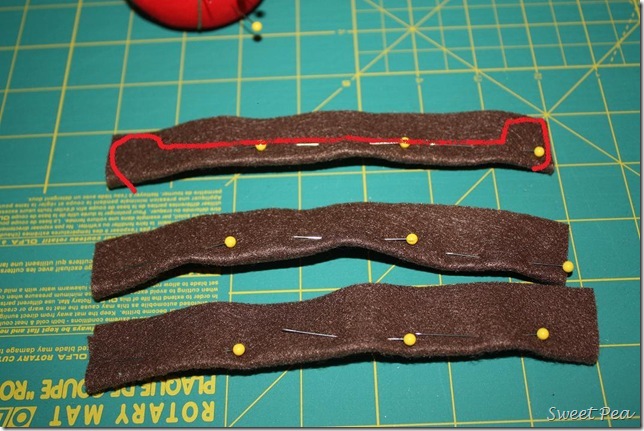
Cut a heart shape on each end of the strip, stopping a little less than half-way through the width of the strip.  Then cut from heart to heart.  This is difficult to explain, so I roughly sketched in red how you should cut but be aware that the heart on the right doesn’t look so much like a heart.
Painted VERSION


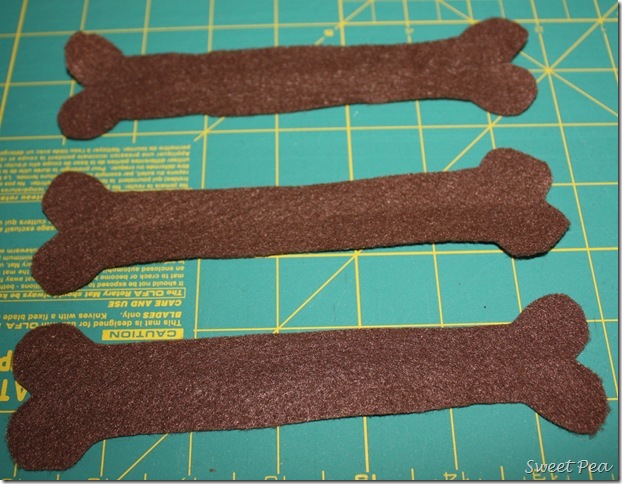
They should look like this once cut.
Ring3


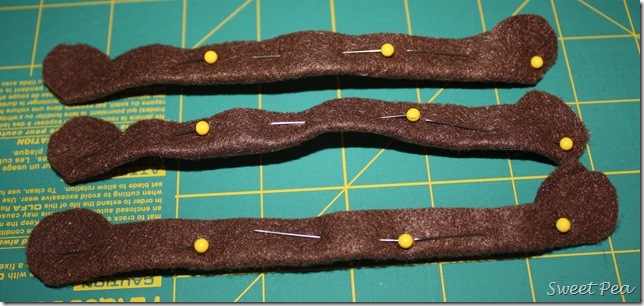
And should look like this when you open each strip.  (Kind of like a bone!)
Ring4


Make the Flower:

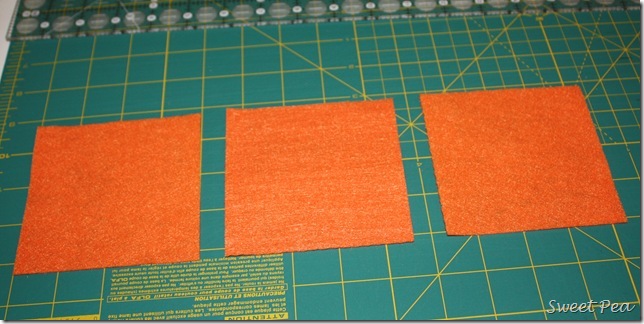
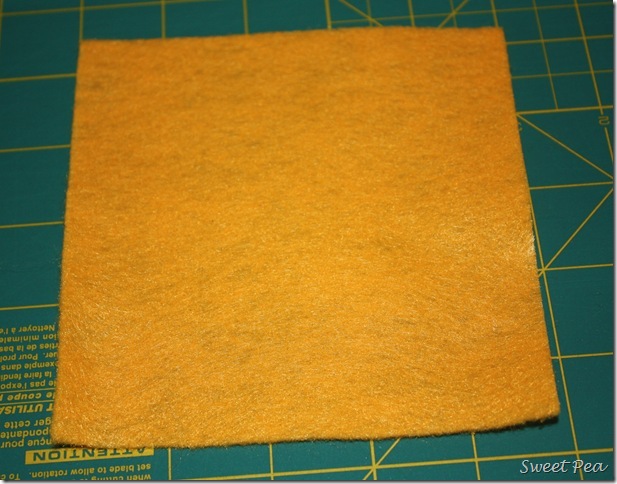
Cut a 4” square for each flower.
Flower1


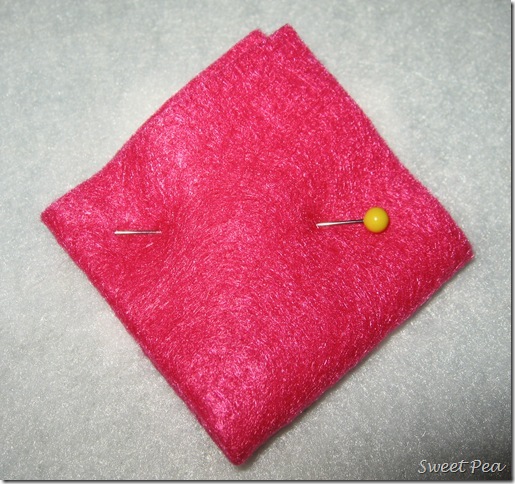
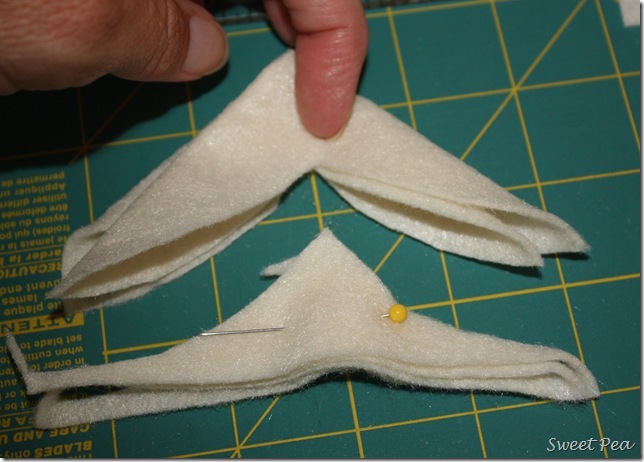
Fold the square into fourths and pin.  (Sorry for the color switch.)
Pink1


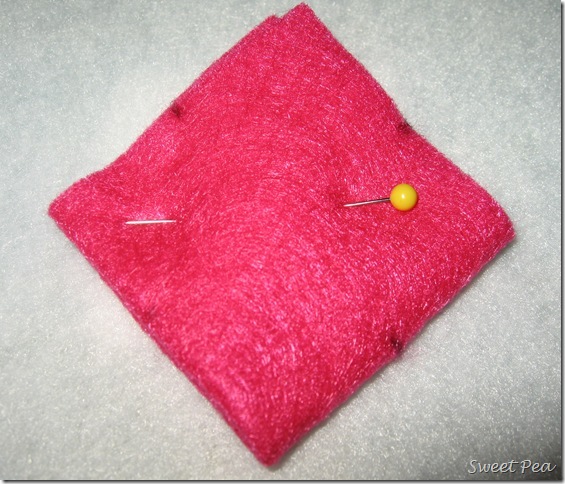
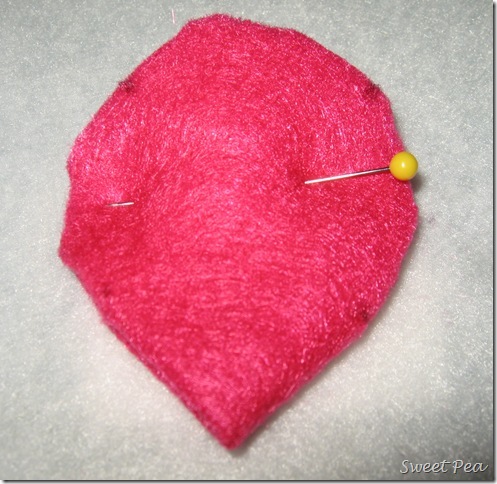
Cut a half circle starting from the halfway point of one side and ending at the halfway point next to it.  (Cut from black dot to black dot.)
Pink2


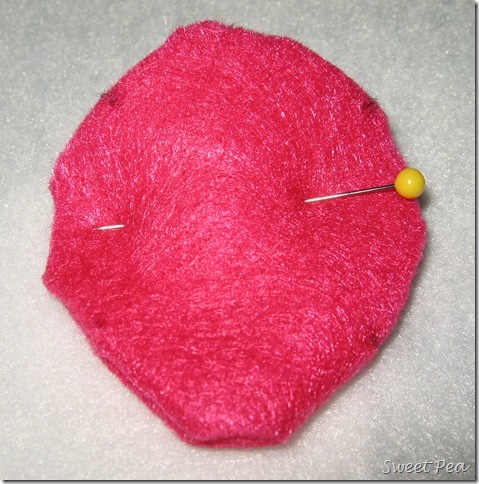
Do not make a half circle on the side that contains all of the folds.
Pink3


Now make a small clip across the folded end.
Pink4


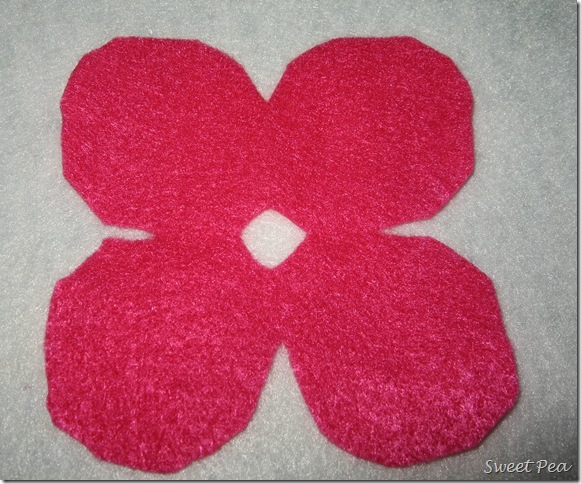
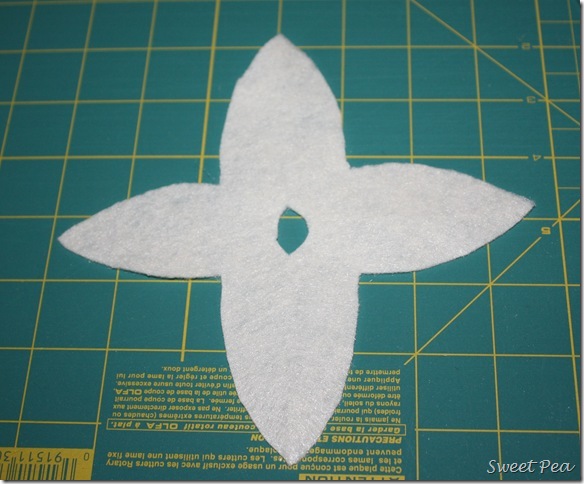
It should look like a flower when you open it up.
Pink5


Make the Sepals:

Cut a 4 1/2” square for each sepal.  In nature these are green but feel free to choose any color you wish.
Sepal 1


Fold the square into fourths and pin.  Cut a sailboat shape out as shown below. (Another felt color change..I made quite a few versions.)
Sepal 2


Cut off the folded tip to make a hole in the center and it should look like this.
Sepal 3


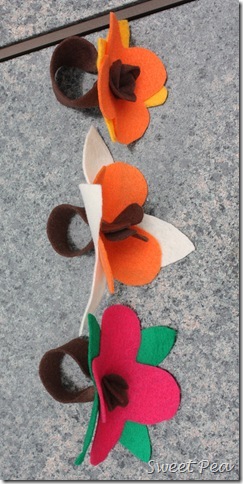
To assemble the flower, place a flower on top of the sepal, lining up the holes in the center.  Wrap the napkin ring part around a napkin and then bring the ends through the lined-up holes and you’re done.
FinishedFinished2


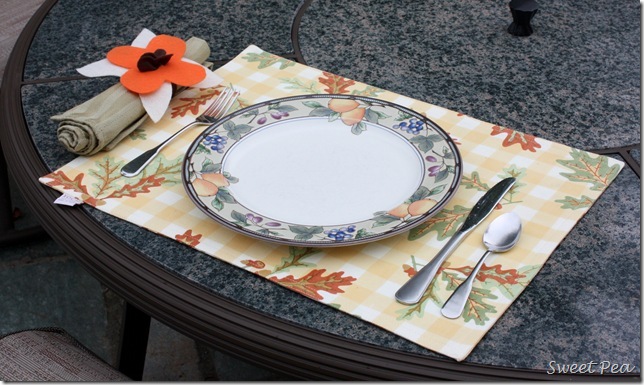
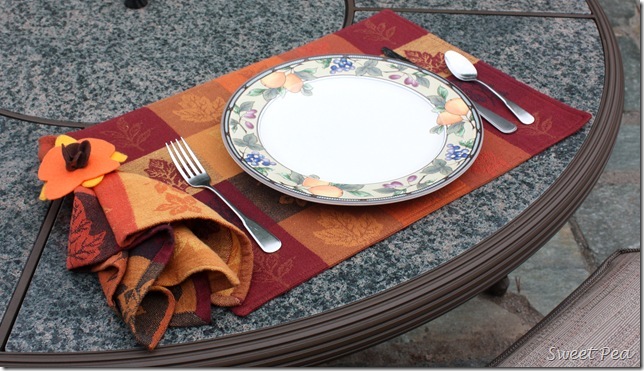
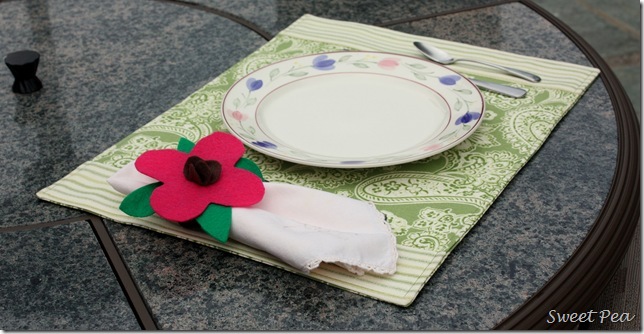
Felt is inexpensive and this idea could be used to coordinate with the season.   Here I’ve used two for a fall place setting and one for a summer one.
Stage1Stage2Stage3

This project makes a great table favor.  Pink or blue could work for a baby shower or all white could be used for a bridal shower.

I hope you enjoyed this project and that you might consider trying it.

Many thanks to Kelli for having me today.  I’d love it if you’d stop by Sweet Pea sometimes for a visit.
Pin It!

Friday, August 19, 2011

Disney Crafts: Mickey Toes

I'm going to preface this post by saying that I'm really not a big fan of feet...they kind of gross me out! So sharing a picture of my feet on my blog is kind of a big deal, but this was such a fun thing to do for Disney that I decided to share it with you:)
**************
To start your Mickey Toes, you need a base coat of bright red.
Then you need to gather your supplies: black nail polish, contact paper, and a hole punch or two.
 Using your hole punch, punch three circles in the shape of a Mickey Mouse head into your contact paper. I ended up using a standard hole punch for the head and a smaller punch for the ears. You can make it work with the standard punch too it will just take some practice. {The top one is done using only the standard hole punch and the two bottom ones I used the smaller punch for the ears.}
 After you've got the perfect Mickey, peel off the back of the contact paper and stick it on your big toe. You can face the Mickey head towards you or away, but I figured I would be looking at it more so I faced it so I could see it:) Press down all around the shape to make sure it is sealed good and no polish will run under the edge.
 Paint a coat of black polish over the cut out Mickey and allow it to dry. You can do more than one coat, but with black you really only need one coat to cover really well.
 Now your toes are ready to head to Disney and visit Mickey Mouse:)

Pin It!

Tuesday, August 16, 2011

Disney Crafts: Autograph Book

One of the most memorable things about a Disney vacation is getting to meet the characters. Before our last trip I remember worrying about my boys being scared of the characters, but when we got to Disney my boys couldn't get enough of them. Well, except for the princesses who they refuse to even stand beside for a picture:) Getting autographs is a big part of meeting Mickey, Donald, and even the Green Army Man, so every kid needs to have an autograph book. Sure you can buy the ones that they sell in all the gift shops, but why not make your own really cute {personalized} version for way less money!
 I started our autograph books with a small spiral bound notebook that I picked up at Walmart for less than $2. Using my Silhouette, I cut a few Mickey heads and the year out of white contact paper. Because the contact paper is so thin {and I was trying to cover up the writing on the cover of the notebook} I had to do a double layer of Mickey heads on the cover. Then I cut each of my boys' first initials out in black vinyl { I used a font called Waltograph} and put the initial onto the white Mickey head. If you look closely at the top right corner, you can see that I also added a small piece of black vinyl to cover up the smaller logo {Mead} that was on the front cover.
 To add a little bit of color, I wove a piece of red and white checked ribbon through the metal spirals of the notebook and tied a knot in one end. On the other end of the ribbon, I tied on a retractable Sharpie that is just the right size for the characters to sign their names. {I read somewhere that it is hard for them to grip smaller pens with their big character hands, and these retractable Sharpies worked wonderfully on our last trip.}
Now all three of my boys are ready to get some autographs from Mickey Mouse and all the gang...and I'm hoping maybe we can manage to get at least one picture with a princess:)
Pin It!

Tuesday, August 9, 2011

Eleven Days

According to Eli, in eleven days we will be on our way to Mickey Mouse's house. We are all excited for a fun vacation, and the boys are even more excited that we will be celebrating a birthday or two while we are there. I think counting down to anything makes it seem more fun and it keeps the "how many days until..." questions to a minimum.
{check out some of my other countdowns here, here, and here}
So here is this year's Countdown to Disney!
After almost two months with no birthdays, I am finally changing out our happy birthday sign and putting a little Disney in it's place:) Here are the supplies I used for our Countdown to Disney:
I started by adding squares of scrapbook paper inside of three small frames.
Then I used my Silhouette software to type up the numbers 1 through 11 and the words "days until Disney". I used a couple different fonts just to keep it fun:)
I used my Silhouette to cut the numbers and words out on black vinyl.
The words were added to the glass part of two of the frames using transfer paper.
{BTW, I am having issues with the Silhouette transfer paper not being sticky enough...anybody else have the same problem, or know of something better to use instead?}
The numbers were added to the Disney paint chips that I picked up at Home Depot. I knew these would be great for a Disney themed craft the second I saw them:) I grabbed a few colors just to make it more fun, but you could always do them all the same color too...maybe red!
I used some double stick tape to attach the paint sample to the glass of the last frame, and then hung them back on the board. To change out the days, we simply have to pull off the paint chip and attach the next numbered paint chip with double stick tape.
While I'm planning and packing for Disney, the boys will be counting down the days until we are at Mickey Mouse's house!
Join  us Saturdays at tatertotsandjello.com for the weekend wrap 
 up           party!
Pin It!

Friday, July 29, 2011

Just a Little Thank You

For the past few years, I have been the preschool director at our church's VBS. That basically means I am the organizer and that I have a ton of great volunteers {lots of moms, one dad, adults, and youth from our church} that work with me to make VBS a success. At the end of a  long week of working with cute {but sometimes unruly} preschoolers, I like to let my volunteers know how much I appreciate their help by giving them a little happy! I usually make some yummy cookies, but after my Fluffer Nutter cookie fail I wasn't up to baking any more this week. So when I saw these really cute little hand sanitizers in the school supply section of Target, I knew they would make a great Thank You for my volunteers!
 These little bottles are the perfect size to toss in your purse, backpack, or car but they were just a little too plain.
 I decided to add each of my volunteers' monogram to the front of the bottles just to dress them up a little. I started by pulling off the front sticker of each bottle, then I sprayed them down with this lovely stuff. I've never used Goo Gone before, but after it removed the sticky residue from 40 little bottles in less than half an hour....I am in love!
Then I used my Silhouette to cut out all the letters that I needed out of white contact paper. If you've never tried to use contact paper instead of vinyl in your craft cutter, I highly recommend it. A huge roll of contact paper cost around $6, and it cuts perfectly with most any craft cutter {I've used it with my old Cricut and my Silhouette}! After about an hour of peeling and sticking letters,  I ended up with an army of cute monogrammed hand sanitizers!
 And I even managed to make on for myself:)
Now all my volunteers will know how much I appreciate them, and they will have clean hands!
Pin It!
Related Posts Plugin for WordPress, Blogger...