Home AboutMe Crafts Food

Tuesday, March 1, 2011

Sweet Dr. Seuss Snack

*Click HERE for an updated version of this SUPER cute Dr. Seuss Snack!*
Tomorrow is Dr. Seuss' birthday!
I love that my kiddos' school spends the whole week celebrating one the most beloved children's authors, and I love even more that they get to read some of Dr. Seuss' wonderful books this week!
Henry's teacher asked if I would bring a fun snack for their class tomorrow and she suggested these fun and easy
GREEN EGG CANDIES!
All you need is candy melts, green M&Ms, wax paper, a template, and a squeeze bottle.
 Start by finding clip art of an egg and printing it out whatever size you want your Green Egg Candies to be. Printing the egg on a black background makes it easier to see the edges of the egg. Place the printed egg under some wax paper so that you can trace the shape on top. This step isn't necessary {you can freehand the shape if you would like} but it helps to make all the candies the same size.
 Place your white candy melts in a bowl and microwave according to the package directions.
 Pour your melted candy melts into a squeeze bottle.
 Simply trace around each egg and then fill it in with candy melts. Be sure to add the green M&M before the candy hardens too much.
 Allow the candies to dry on the wax paper. Mine probably only took 15-20 minutes.
 Here's a little tip: If your candy melts start to harden up in your bottle, place the entire bottle in a cup of warm water to keep the candy as melty as possible:)
 Serve them up on a cute green plate or ship them off to school in a big box...either way your kiddos will love celebrating Dr. Seuss' birthday with these fun Green Egg Candies!

Pin It!

Monday, February 28, 2011

Apple Sandwiches

I saw these cute apple sandwiches a few weeks ago, and I knew that these would be perfect to send when Grant's teacher asked me to bring an apple snack for their class! I can not remember where I saw them though, so if anyone knows the original source let me know so I can give them credit.
Five Easy Steps to Apple Sandwiches
1. Thinly slice apples. I used a mandolin, but a knife would work just fine too.
2. Use a small cookie cutter to remove the core of each apple slice.
3. Cover one side of each apple slice with peanut butter. The peanut butter sticks easier if you dry the apple slice off with a paper towel.
4. Coat half of the apple slices in mini chocolate chips by dipping the slices peanut butter side down into a small dish of chocolate chips.
5. Sandwich one peanut butter apple slice together with one peanut butter and chocolate chip apple slice.
Enjoy!
Weekend Bloggy Reading
Pin It!

Thursday, February 24, 2011

Cherry Red Table

I have to admit I didn't always love spray paint. But that was back when I was foolish enough to think that the cheapo spray paint was as good as the more expensive stuff. I would go through two or three of the $1.99 cans of spray paint on a project, and end up with poor coverage and a sore trigger finger! Then I discovered how wonderful name brand spray paint can be. I have used both Valspar and Krylon, and they are both WAY better than the cheapo cans I used to buy...and really they aren't that much more expensive!
******
My latest spray paint victim is this lovely but {oh-so} boring table that has been a resident of our foyer for quite a few years. My mom bought it for us at a thrift store a few years ago, and it fit perfectly in the space. I wasn't really thrilled with the ultra-traditional look of it, but it was good enough. I decided that spray paint was the way to go for this table redo mostly because I was so happy with how spray paint transformed my end table!
Jason helped me disassemble the table, we sanded it down just a little, I covered the mirror with newspaper, and then I got busy spray painted the table with Krylon Cherry Red!
{This is a close up of the color just because my 'after' picture didn't really show the true color.}
I am still amazed at how well the spray paint covered and how professional it looks....and it only took two cans of spray paint and two hours!
My newly spray painted Cherry Red table complete with new fabric covered lampshade:)
Have you spray painted anything lately?
Pin It!

Monday, February 21, 2011

Miscellany Monday

I'm thinking about starting a new thing on Fridays....I'm still not sure what I want to call it, but I would really love to feature some of my favorite bloggers! I am always SUPER excited when another blogger features me, so I thought it would be nice to return the favor:) I was thinking maybe Featured Friend Friday?!? What do you think about the name, and would you like to be featured here? I would love to feature your blog...big or small, beginner or old pro!! Leave a comment on this post with a link to your blog and/or send me an email and maybe I can get started on this soon!
*****
I somehow managed to use up all of my photo storage space through blogger! That means no more pictures until I pay for extra storage or go delete old pictures from my picassa account. I don't think $5 per year for a ton more storage is too unreasonable though. Hopefully I can share pictures of my fun {Cherry Red} table makeover with you soon:)
*****
Jason and I are doing the Cinch 5 Day Fast Forward cleanse again this week. I am hoping this time I can manage to stick with the plan after the first five days are over, and maybe I can read the Cinch book that I bought a month ago and then never read.
*****
Just in case you missed my post from Friday, click HERE to read a funny conversation I heard from my backseat:)
*****
Henry and Grant are starting tennis lessons today. We originally planned to let them play baseball this spring, but the closer ball season got the more I dreaded all those late nights at the ball fields. So we decided that tennis would be a fun spring sport instead....and the best part is that practices are right after school so no late nights at the ball fields for us:)
*****
My friend Amanda is having a SUPER fun Crafty Cutter Party today! If you've made any crafts using your Cricut or Silhoutte go link up. If you don't have a craft cutter you can still hop over and check out all the really great ideas!
Serenity Now Crafty Cutter Party
*****
Don't forget to hop over to Carrisa to check out everyone else's miscellanies!!
Pin It!

Friday, February 18, 2011

Heard From the Backseat

Henry: Boys have red lips even if they don't wear chapstick or lipstick.
Grant: Yeah, and you can't wipe it off because that's how God made you!
Pin It!

Thursday, February 17, 2011

How to Recover a Lampshade

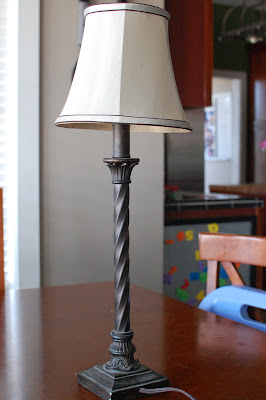
I had this lamp.
It wasn't terrible, but it wasn't really great either.
It's just the right size for the table in my foyer, but the shade was a really weird green color that looked even worse once I painted the table it sits on red!
 Instead of just buying a new one, I decided to salvage the lamp by recovering the lampshade...a quick, easy no sew project. Start by tracing a pattern of your lampshade on some paper. Do this by rolling the lampshade while using a pencil to follow along the top and bottom edges of the lampshade. Then use a ruler to connect the two lines at both ends.
 Cut out your pattern and test fit it on your shade.
 Make any adjustments in size, then pin your pattern to your fabric and cut.
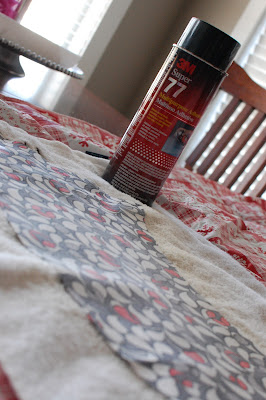
 Apply heavy duty spray adhesive to the wrong side of the fabric. Then carefully wrap the fabric onto your lampshade.
 The piping on my original shade matched the new fabric, so there was no need to do anything to the edges of the lampshade. If you want to cover the edges, make the fabric a little larger and fold over the edges. You can also hot glue on some matching ribbon to cover the rough edges of the fabric.
Now my lamp is much more fun and it matches my new red table perfectly!
Pin It!

Tuesday, February 15, 2011

Cookie Inside a Cookie

Just in case you didn't get enough chocolate on Valentine's Day:)
I first saw these a few weeks ago on Be Different, Act Normal
...who saw them on Becky Bakes
...who saw them on Picky Palate!
Jenny at Picky Palate has an awesome step by step tutorial on how to make these along with the chocolate chip cookie recipe she used. I used my own tried and true chocolate chip cookie recipe and they were awesome. I even think you might be able to get away with using store bought cookie dough:)
Pin It!

Monday, February 14, 2011

Valentine Eye Candy

Happy Valentine's Day!
Here are a few fun things that I found while looking for some Valentine inspiration:
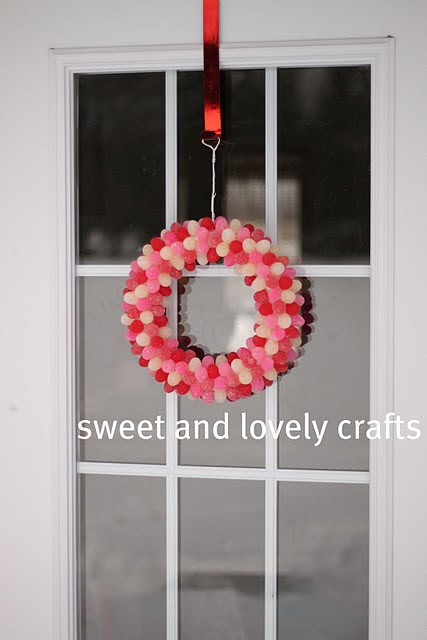
 Gum Drop Wreath @ Sweet and Lovely Crafts
 Valentine Mantel @ Kelly is inspired
 Valentine Lunch Box @Three Pixie Lane
 Valentine T Shirts @ Crafts & Sutch
I Choo-Choose You Treats @ Craft Goodies

I hope everyone has a SUPER {chocolate-filled} Valentine's Day:)

Pin It!

Friday, February 11, 2011

Valentine Kissing Ball

This craft was on my original "Valentine To Do List" that I made back in January. It is such an easy craft that someone who thinks they have zero craftiness can do this with no problems! The fun part about this craft is that there are no special tools {not even a hot glue gun} required!
 Supplies:
Styrofoam ball
ribbon
tissue paper
paper clips
Start by adding a hanger to the top of the Styrofoam ball with a piece of ribbon and a paper clip.
 Cut your tissue paper into strips {mine were approximately 4 inches long by 1 inch wide} and then crumple the tissue paper up a little.
 Feed about three pieces of the crumpled tissue paper halfway through a paper clip and then fold the ends up...you will probably have to fluff the tissue paper a little after squeezing it through the paper clip:)
 Stick the paper clip into the Styrofoam ball until the tissue paper is flush with the outside of the ball.
 Continue filling in with your tissue paper. Put them close together for a fuller kissing ball and further apart for a not so fluffy look.
 Hang on a door knob to add a little Valentine fun to your house.
These are even more fun hung up high so you can actually use them as Kissing Balls, but everyone in our house has had the crud so I figured a door knob was a safer bet:)

**Tip Junkie has a whole post on different kinds of Kissing Balls...go check them out here!**
Pin It!

Wednesday, February 9, 2011

Related Posts Plugin for WordPress, Blogger...