


Last year on my blog, I raved about how much I love Shutterfly! I loved them even more after I got my 50 free Christmas cards in the mail and I saw how awesome they were...seriously the best quality cards I have seen in my 6 years of ordering photo Christmas cards! So I'm going to spend a little time this year telling you about how great Shutterfly really is....and then I might just tell you how you can get some free cards too:)
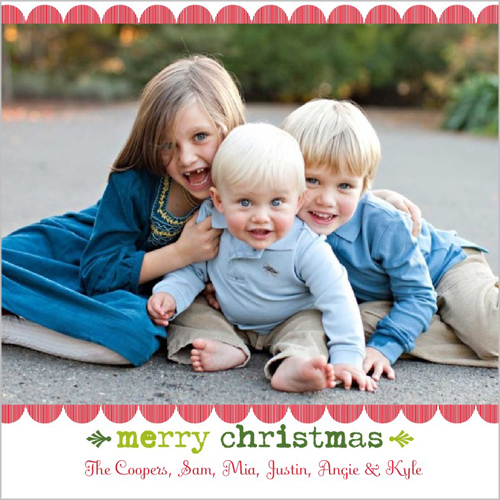
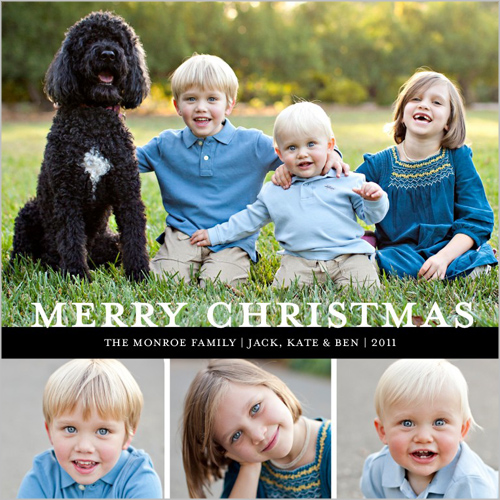
Here are a few of my favorite photo cards from this year...though it is pretty hard to top our Shutterfly card from last year!


Can you tell that I love the look of a square card:) Now I need to get busy picking out clothes and planning a photo session!
I love the great quality cards that Shutterfly offers for the holidays, but did you also know you can get some really awesome photo gifts to give to aunts, uncles, and grandparents! My mom has already requested a photo book of my boys as a Christmas present for this year:) I'm fine with that, because I know she will love it....and I will have a great time designing it on Shutterfly's website.
If you are planning a holiday party in the coming months, you can check out the great selection of invitations that Shutterfly has on their websites too! I'm thinking it would be really fun to host a cookie swap, and I would love to send out some of these fun invitations:
 I'm off to browse Shutterfly's amazing selection of cards, and try to make a decision about which card to chose for this year!
Which Shutterfly Christmas card do you like best?
*I received a code for 25 free Christmas cards from Shutterfly for sharing about their cards with you. All opinions are my own. If you have a blog and you want to join their blogger program, click HERE.*
Here are a few of my favorite photo cards from this year...though it is pretty hard to top our Shutterfly card from last year!

Can you tell that I love the look of a square card:) Now I need to get busy picking out clothes and planning a photo session!
I love the great quality cards that Shutterfly offers for the holidays, but did you also know you can get some really awesome photo gifts to give to aunts, uncles, and grandparents! My mom has already requested a photo book of my boys as a Christmas present for this year:) I'm fine with that, because I know she will love it....and I will have a great time designing it on Shutterfly's website.
If you are planning a holiday party in the coming months, you can check out the great selection of invitations that Shutterfly has on their websites too! I'm thinking it would be really fun to host a cookie swap, and I would love to send out some of these fun invitations:

Which Shutterfly Christmas card do you like best?
*I received a code for 25 free Christmas cards from Shutterfly for sharing about their cards with you. All opinions are my own. If you have a blog and you want to join their blogger program, click HERE.*


