Home AboutMe Crafts Food

Friday, November 18, 2011

Gobble, Gobble: Turkey Waffles

Yesterday I admitted my obsession with crafty kids shirts, so now it's time for me to admit that I am just a little bit obsessed with fun waffles too! The first waffle I made was a rainbow waffle to celebrate St. Patty's Day. It's fun to have a colorful breakfast to help celebrate a holiday...but once I started I couldn't stop. I've shared some just because waffles {cupcake waffles} and a whole lot of holiday ones too {candy corn and jack o lantern}.

I have been brainstorming Thanksgiving ideas for a while now. It's amazing how hard it is to come up with a good waffle idea for a holiday based around food:) I tried to make Cornucopia Waffles with an abundance of M&M's, but all that did was make a huge mess of the waffle iron. So I decided to give Turkey Waffles a try instead. Now I know the name makes them sound kind of gross because seriously who wants savory turkey hiding in their waffles! Don't let the name scare you off...there is not a trace of real turkey in these fun and colorful Thanksgiving waffles:)
I started with the usual suspects...and my usual helper:) 
**waffle mix, food coloring, and Eli**
 Mix up your waffles according to the directions. You will need four waffles total to make two turkeys. By the way, these are sharing waffles...two people per turkey:)
*Start by making one plain waffle.*
*While that waffle is cooking divide your remaining batter into three bowls.*
*Add green, yellow, and orange food coloring each into one of the bowls and stir to combine.* 
*Cook the three colored waffles and then get ready to assemble.*

Start by cutting the plain waffle in half and the colored waffles into quarters.
Lay out the colored waffles in a turkey tail pattern starting with the outside ones{green here} and working your way in. Lay the half plain waffle on top of the turkey tail and adjust as needed. Use one of the leftover yellow quarter waffles to make a beak for your waffle. I simply cut off the pointed edge and added it on top of the plain waffle. 
What kind of fun foods are you making to celebrate Thanksgiving this year?
Pin It!

Thursday, November 17, 2011

Pilgrim and Indian Initial Tees

I have shared countless times about my slight obsession love of crafty kids' holiday shirts. I'm actually starting to think that maybe I should start a support group, but I might be the only crazy member! Anyway, with Thanksgiving only a week away, I decided to take advantage of our little sick day yesterday and get some sewing done on the boys' shirts for this year. I knew I wanted to attempt a cute turkey face shirt for Eli {I'll share his shirt later after I figure out how to add the eyes without making the turkey look crazy}, but I wasn't quite sure about what to do for Henry and Grant. I stumbled across a Pilgrim initial tee on Etsy earlier this week and as soon as I saw it I knew my boys were getting Pilgrim and Indian shirts this year:)
I won't bore you with all the details{and a million pictures} of how I made these shirts...you can go back and check out one of my other step by step tutorials if you like. But just so this isn't a single picture with a ton of rambling, I will share a quick rundown of how I made these.

**Print out each kiddos initial {mirrored} and attach it to orange and white gingham.**
**Cut out the letters and attach them to some orange felt.**
**Sew the letters to the felt with a zig-zag stitch and then cut around each letter leaving an orange border.**
**Use spray adhesive to hold the letter to the shirt, then stitch around the letter to attach it.**
**Make the pilgrim hat and indian headband out of scraps of felt. **
**Use spray adhesive to hold them in place and then sew them onto the shirts.** 

Really the hardest parts of this project are deciding which font to use for the letters and getting the proportions of the hat right so that it looks like a Pilgrim's hat and not a crazy top hat:) For those of you that don't sew, you could also make this no sew with some ultra hold iron on adhesive! Except for the new white long sleeve shirts, I used all materials that were in my craft stash making these shirts cost around $5 each. Not too bad for two SUPER cute Thanksgiving shirts!
Weekend Bloggy Reading
Pin It!

Monday, November 14, 2011

Using Actions for Photoshop Elements to Edit Your Photos

I've had a DSLR camera for a few years now, and having a nicer camera {even though mine is the the bottom of the line Nikon D40} really has improved my photos. Besides the fact that the quality of the photo is better, having a DSLR makes me think out the composition and lighting of my photos a lot more than when I simply used a point and shoot digital camera. But having a good camera is only the first step in taking great photos...you also have to know how to edit pictures to get the most out of each shot!

There are more than a few editing programs out there, some are outrageously expensive and some {like the one I have} are more affordable. I use Photoshop Elements for all my editing. I bought it when we got our new laptop a few years ago, and I think it cost somewhere between $80 and $100. The only problem with photo editing programs is you really need to know how to use a them to get the most out of them...and it can be quite complicated to figure out!

My biggest help in using PSE to edit my photos was when I discovered Actions! And even better I found some really awesome FREE Actions! I've downloaded free Actions from two websites {and I'm sure there are lots more out there too} : The CoffeeShop Blog and The Pioneer Woman. Having these actions has really helped me improve my pictures! I love all the different options that both of these websites provide, and I love the different feel you can get just by clicking a few buttons!

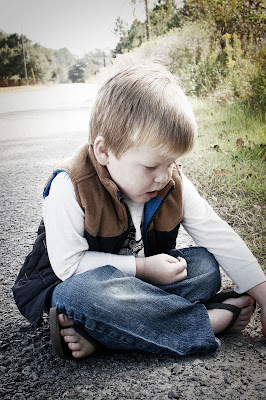
Just to show you what Actions can do for your photos, here are a few straight out the camera shots along with some shot that I edited with the free PSE Actions that I downloaded. I am not an expert with these by any means, and I honestly can't remember the names of the Actions that I used for each picture. I usually just click an Action and see how I like it with the photo. If I don't like it, I just click undo and start over. These next three photos were all edited with The Pioneer Woman Actions, but you can see some photos that I edited with The CoffeeShop Blog Actions HERE.

                             SOOC                                                                              Edited with PSE Actions


{{Can you tell I like taking pictures in this spot!}}
I'm sure there are a few professional photographers cringing at my overeditednotverygood photos, but I think they look pretty great for a self taught phtotographer with SUPER squirmy kids! IF you are looking for a way to edit your photos without blowing the bank {or blowing your mind}, check out PSE. The abundance of free downloadable Actions totally make Photoshop Elements worth the initial cost.

{FYI I wasn't paid to share any of this with you even thought I know it sounds kind of like a sales pitch:) I really have been having a ton of fun editing my picture {including the photos that I used with my Thankful Photo Decor} with these free Actions lately and I thought you might want to know about them too!}

Pin It!

Friday, November 11, 2011

Friday Flashback: Craft Edition

**This is a re-post from last year. I have been looking for some great Thanksgiving shirt inspiration for this year, so I figured I would share one of my Thanksgiving shirts for last year in case anyone wants to attempt it for their kiddo!**

I have seen a ton of cute turkey shirts for Thanksgiving floating around the internet lately. I had intentions of making my boys a cute turkey shirt, but was really wishing I could make something a little different and a little more fun instead.

The Shirt of Plenty is what I ended up with after a TON of inspiration {and a template} from Family Fun magazine.
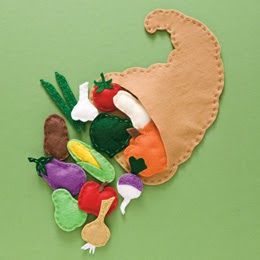
This is the original craft shared in the November issue of Family Fun...SUPER cute Thanksgiving themed felt food. I simply decided to turn my felt food into a shirt instead of making a toy:)
The first step in making this SUPER cute shirt is to print the templates and cut them out. Sometimes the template calls for two of each shape, but you usually only need one.
Use spray adhesive and stick the cut out shapes to different colors of felt. You can mix and match however you want, or follow the suggestions on the templates.
Then add iron-on adhesive to the backside of the felt following the directions on the package.
Cut out the shapes following the template, then remove the paper and the iron-on adhesive backing.
Lay out your design on the shirt and decide where you want each piece to be. Iron the pieces onto the shirt following the directions on your package of iron on adhesive.
The finally step to making The Shirt of Plenty is the most tedious and time consuming....but it also makes a big difference in the appearance of the shirt. Using coordinating colors of embroidery thread, go around the edges of each piece of felt with a running stitch. Make sure to tie off each end of the embroidery thread well, so that the felt pieces stay securely attached.
And that is how you make a SUPER cute Thanksgiving shirt!
Now if I can only find the time {and energy} to make two more:)
Pin It!
Related Posts Plugin for WordPress, Blogger...