Home AboutMe Crafts Food

Friday, June 10, 2011

A Litte About OCD and a Sewing Tip

Hi my name is Kelli and I have OCD:) Well it is actually self diagnosed, first born, rule follower, lover of straight lines OCD, but I'm sure a lot of you understand. And let me just say that the need for perfection and crafting don't always go very well together. I have learned that crafts {or at least my crafts} are far from perfect in most cases....and that is something that can be hard for my straight line loving self to accept.
Sewing has been a crafting Achilles heel for me, mostly because I'm not very good at it and that leads to small imperfections that drive me a little bonkers. I have issues with cutting and sewing straight lines...and lets not even talk about trying to sew in a circle:) As I was working on a project that required me to cut really long straight lines I had an idea...a genius idea that made my straight line loving OCD self very happy!
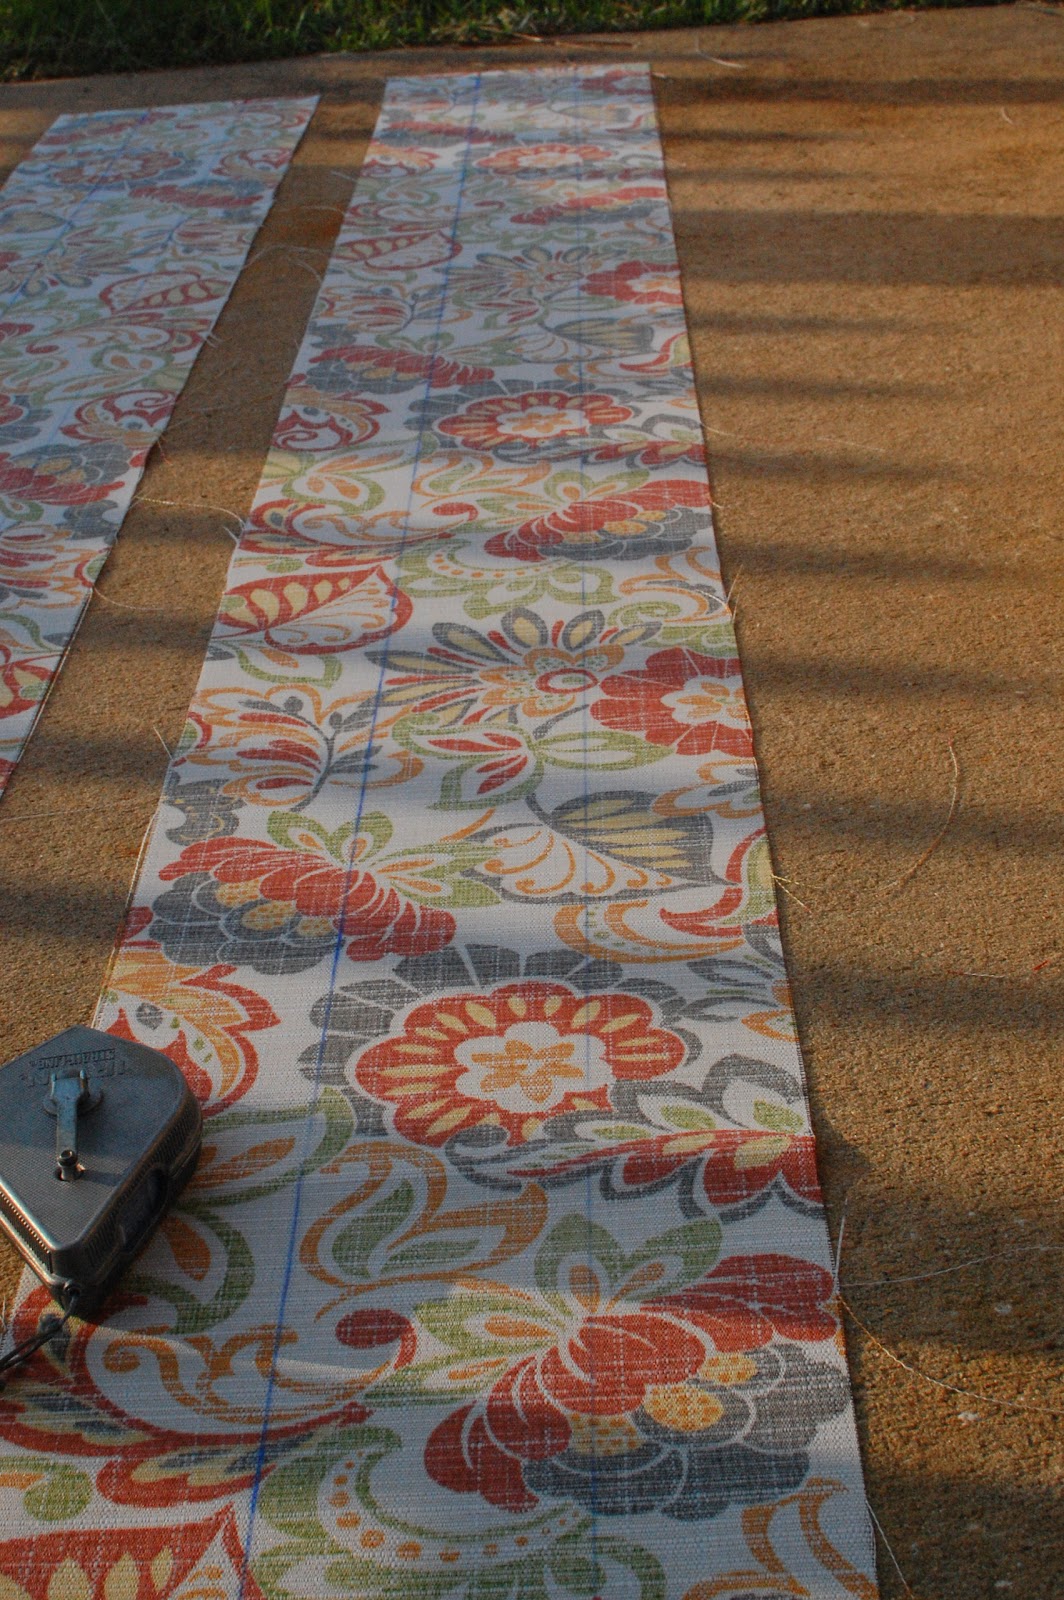
 I borrowed my hubby's chalk line popper thing that you use for making lines on wood. He assisted me in popping a few lines onto the back side of my fabric...
 ....and look what I ended up with! Perfectly straight lines! I couldn't have been happier wth how straight those lines turned out...or how easy they were to achieve! Now if I could just manage to sew these pieces together in a straight line I will be doing good:)
 And just because he is too cute, here is Eli showing off a little bit of what we have been working on in the back yard for the last few weeks. I'm hoping to finish up this weekend and maybe have a full post about our new patio to share with you next week.


Have a great day and paint something bright yellow this weekend:)
Weekend Bloggy Reading
Pin It!

Thursday, June 9, 2011

The Best Lemonade Ever!

**Eli decided to share his germs from last week with me, so I am feeling a little nauseous and vomity under the weather. That means y'all are getting a repost from last summer:) Enjoy!**
****************
When life gives you lemons....
...or when you buy a bag of lemons at the produce stand...
Make Lemonade
We made The Best Lemonade Ever!
Really, that is what the recipe is called, and it was SUPER good!
Ingredients
1 3/4 cups white sugar
8 cups water
1 1/2 cups lemon juice
Directions
1.In a small saucepan, combine sugar and 1 cup water. Bring to boil and stir to dissolve sugar. Allow to cool to room temperature, then cover and refrigerate until chilled.
2.Remove seeds from lemon juice, but leave pulp. In pitcher, stir together chilled syrup, lemon juice and remaining 7 cups water.
I made the water/sugar mixture and chilled it in the fridge.
Then the boys helped me squeeze the lemons. We used a collander over a bowl to catch all the seeds and pulp.
We added our fresh squeezed lemon juice to the water/sugar mixure and then everyone got a turn to stir the lemonade....
...even Eli!
Pour your yummy lemonade over ice and enjoy!
Pin It!

Monday, June 6, 2011

Summer Door Decor

After taking down my Easter decorations, my front doors were screaming for a fun summer makeover. It took me more than a month to decide what I wanted to do, but when I found some really fun yellow and white chevron fabric on sale a few weeks ago, I knew it was perfect for some sort of summer door decor. I paired the yellow chevron fabric with some fun red and white polka dot ribbon and some turquoise lettering and ended up with two bright and summery front door canvases.

I bought two canvases at Hobby Lobby a few weeks ago....they were $5.99 for 2 and then 40% off.
I started by wrapping the canvases with the chevron fabric and attaching the fabric to the back of the canvases with my staple gun. Then I added the polka dot ribbon with a little hot glue. The last step was to add a great summer quote to the front of the canvas...and that is where my new Silhouette comes in:)
This was my very first project using my Silhouette, and I have to say it is SO much better than my Cricut. Seriously check out that cute font that I used for the quote!
I already had some turquoise on my front porch in the form of my placemat pillows, so I decided to add in a little bit of red and yellow to make everything match:) I'm loving all the fun bright summer colors and they are even taking over my back patio too...but that is a post for another day!
What kind of fun summer things are you decorating with this year?
Visit thecsiproject.com
Pin It!

Friday, June 3, 2011

Homemade Donuts

Did you know that today is National Donut Day? Really, it's a holiday...even the big chain donut stores {Krispy Kreme & Dunkin' Donuts} celebrate by giving away free donuts:) But instead of loading up the kiddos bright and early this morning for a free donut breakfast,  we made our own homemade donuts to celebrate!
 All you need to make your own homemade donuts is canned refrigerated biscuits, a rolling pin and a small circle cookie cutter....plus oil to fry your donuts and whatever glaze or toppings you want.
 I mixed up a traditional glaze with powdered sugar and water. It is also helpful to have a cooling rack on top of a cookie sheet to catch all the gooey drips of glaze while your donut is cooling.
 Use your rolling pin and roll out the biscuit dough trying to keep it in as round as possible. Then use the small circle cookie cutter to cut out the middle of the donut. Save the centers and you can make your own donut holes too:)
 The next step is to fry the donuts. This literally only takes a few seconds on each side. Watch carefully and when you see the bottom half of the donut start to brown, flip them over to brown the other side. Take them out of the oil and drain on a paper towel for a few seconds.
 Now it's time to glaze. Simply toss the warm donut into your glaze and give it a few flips to make sure the whole thing is coated.
 Place the glazed donuts on your cooling rack to let them dry.
 Add sprinkles before the glaze sets. You can also leave them plain or add any other kind of topping you would like.....mini chocolate chips or crumbled cookies would be really yummy!
Since I have a house full of sprinkle-loving boys, we topped all of our donuts with sprinkles, then we had a yummy time celebrating:)
Happy National Donut Day!
Visit thecsiproject.com
Pin It!

Tuesday, May 31, 2011

Brownie Waffles

A few weeks ago, I was watching Rachael Ray and she mentioned something about making brownies on a waffle iron. My first thought was that they wouldn't cook all the way through...but I figured I would give it a try anyway. My helper was just a little excited about the idea of Brownie Waffles...can you tell?!?
I got a little more help cracking the eggs.
Then we gave the batter a stir. I added a little bit more water than the recipe called for so that it would spread on the waffle iron better.
Fill up the waffle iron and spread the batter around.....
....just don't forget to spray your waffle iron with cooking spray or you will end up with a crumbly mess of brownies!
These would be so fun served up with some whipped cream or a big scoop of vanilla ice cream:)
Can you tell I'm on a waffle kick lately?!? I actually have a few more ideas in my head {and pantry} so be on the look out for some fun waffle ideas in the next few weeks!
Pin It!

Friday, May 27, 2011

How to have Decent Furniture with a House Full of Boys

This is our breakfast table. From a distance it looks pretty good.
 But the closer you get, the easier it is to tell that a house full of boys use this table and it's {unfortunately} cream colored chairs on a daily basis.
 Now don't get me wrong, these chair started out a beautiful cream color and they stayed that way for a few years in my {rarely used except for crafting} dining room. When we finally outgrew our 4 seater table, the logical thing to do was to move this bigger table into the breakfast nook for everyday use....the only problem was those beautiful cream colored chairs. We tried being careful, we tried cleaners, we tried scrubbing...nothing was going to keep those chairs clean! The only solution was to recover....using something a little more durable than cream colored fabric!

I considered using a vinyl type fabric so that spills would clean up easy, but who wants to eat dinner on a chair that squeaks like Marie Barone's couch:) That is where this bolt of fabric comes in. I picked it up at Hancock Fabric on clearance for $6 a yard...and it is outdoor material! I figured outdoor material would repel stains and clean up easier than normal fabric, plus it was so cheap that I got a few extra yards so I can recover them again if we have any major oops!
To recover your chairs, simply remove the seat from your chair. Cut out a piece of fabric big enough to cover the front of the seat and wrap around the sides.
Use a staple gun to attach the fabric to the underside of the seat and then cut away any extra fabric.
Covering up those stained cream cushions made our chairs seem like they were brand new...now we are just waiting for our first spill to test out our newly recovered chairs!


And just for fun here is a before and after....though I almost considered labelling them the opposite because the first one is "after kids have been here" and the second one is "before kids have been here":)

So how can you have decent furniture with a house full of boys....cover up their stains and have an extra stash of fabric just in case they when they inevitable make more!
Weekend Bloggy Reading
Pin It!
Related Posts Plugin for WordPress, Blogger...